


Lead Your Platoon to Victory!
Taking on the role of the HQ Commander is not an easy task. Nor should it be. You are the driving force behind your troops' success in capturing the islands of Arland, Everon, or Kolguyev. But what if you've never led a platoon? This Boot Camp is here to help you understand the basics of the Commander role in Conflict: HQC.
To become your faction's commander, you need to approach the wooden "COMMAND POST" sign on the outside of the HQ tent ("VELITELSTVÍ" on the FIA tents, and "КОМАНДНЫЙ ПУНКТ" on the Soviet tents) and trigger the user action. A vote will then begin in which the rest of your platoon can decide whether you will become the next Commander. If you're voted in, you will leave your original selected group and become a sole member of the Command group. This group offers only a single pre-made loadout of the officer with a handgun. You're here to lead, not to fight.
Here are some basics a good commander should follow at all times for the benefit of everybody:
Stay near the HQ tent and be ready to quickly respond to requests and situational changes across the battlefield.
This is imperative. A commander who is not at his post cannot do his job and is therefore a liability to the team.
If you feel like fighting, going on an assault mission, delivering supplies, or flying a close air support mission, relinquish your Command. You can do so at the same wooden sign outside the command tent.
Once you relinquish your command post, an AI commander will take over. This will lead to automatic request confirmations, so your platoon, such as your engineers, will not have to wait for you to get back to your post.
If necessary, you can also use a Mobile HQ vehicle for commanding in the field.
Stay on comms!
Keep your microphone ready and your text chat interface on.
Access to information and quick response times are key to a dynamic and effective platoon.
Not relaying information can be damaging to your assaults and defenses.
Have multiple separate radios in your inventory and keep track of individual group frequencies.
Instead of overwhelming the platoon radio channel with information only relating to a portion of your troops, talk to the assigned groups individually.
Use platoon-wide comms only for vague information relating to everyone, but beware of enemies listening in.
Know your capabilities
Learn everything a commander can do and should do before you take command. Others will rely on you, and the outcome of their game could hang on your decision-making.
Build up defences
Enemies get an extra rank progression bonus for eliminating the commander; this can make you a prime target.
Command from a safe base far away from the frontlines.
Use defensive structures, spawn AI defenders, utilise mines. Be ready to get out fast and to the nearest safe command post. Stay alive!
HQ Tent Stations
The HQ tent comes with three individual stations, each fitting a different purpose. They are located around the tent (each faction has a different layout), and knowing intuitively where to go can help you tremendously.
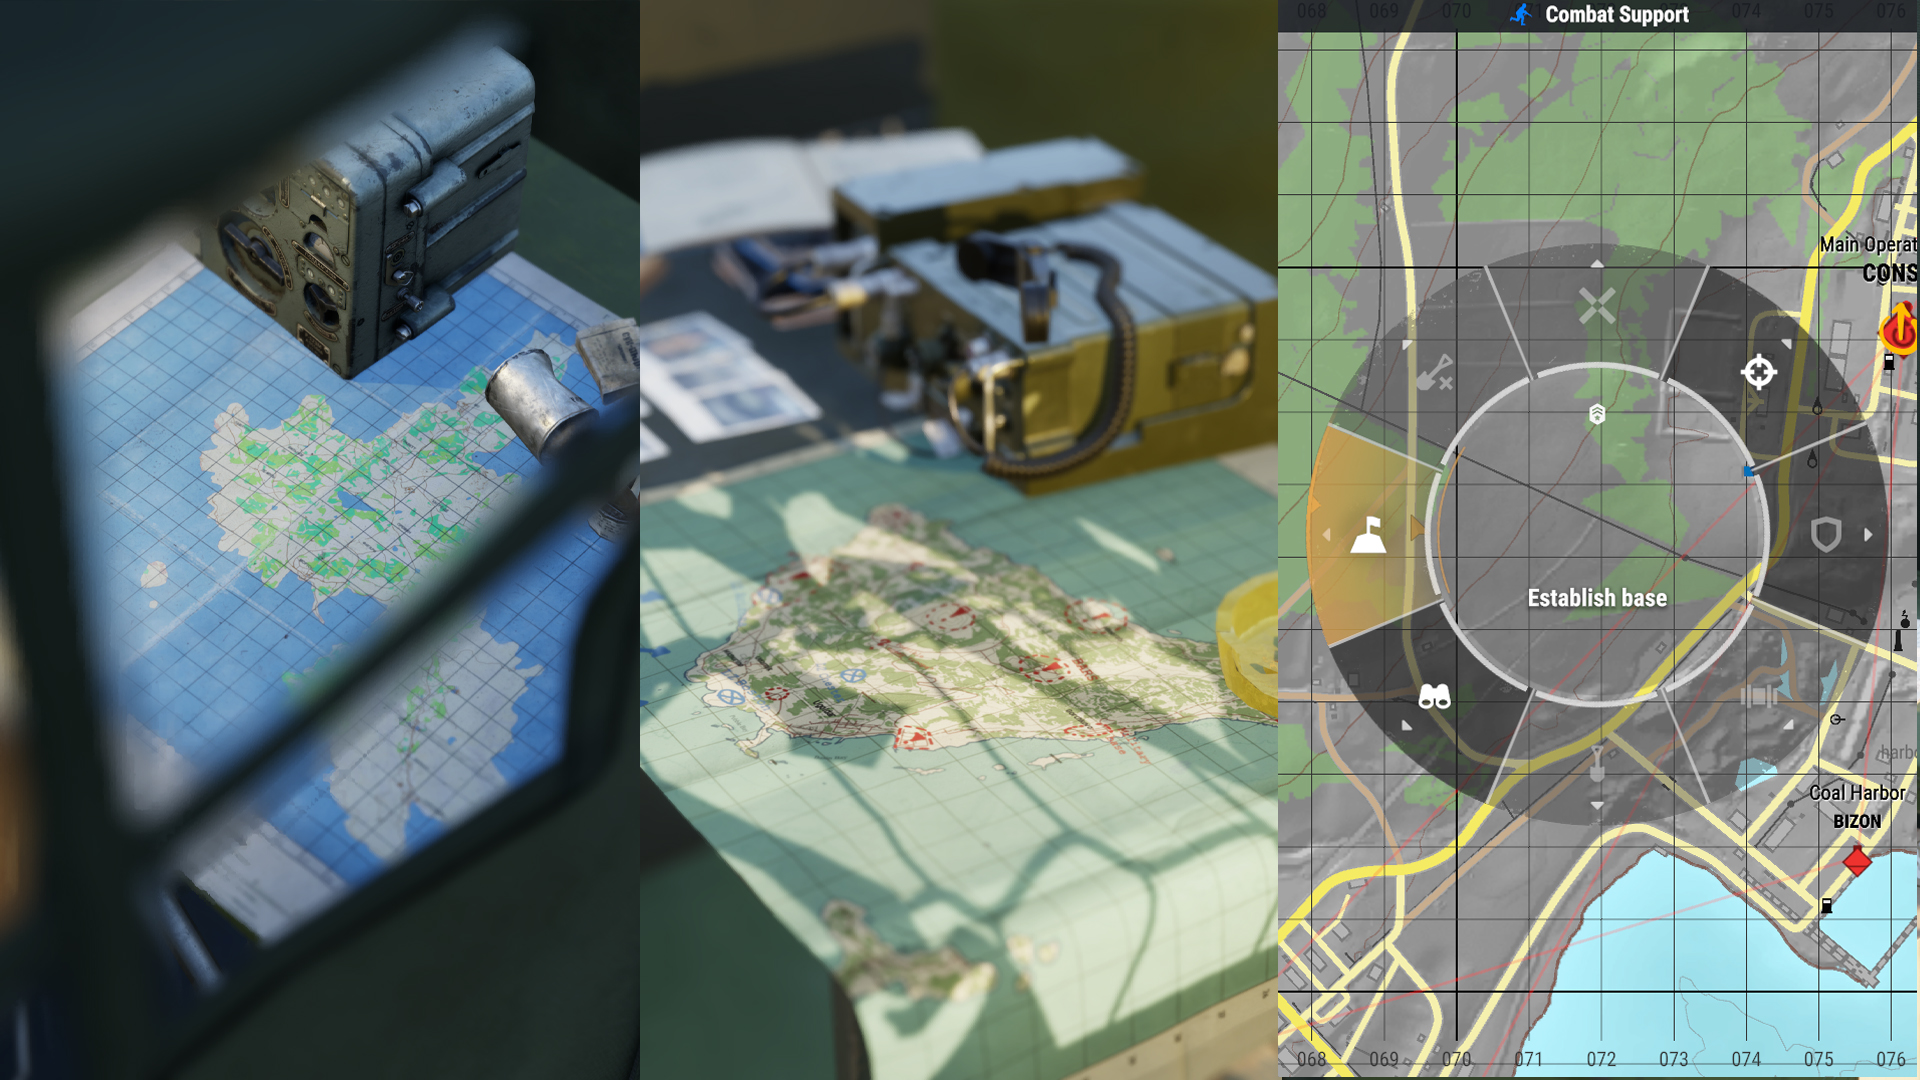
Combat Support
This station lets you issue faction-wide commands, assign groups to said commands, see their progress, plan the faction's strategy, and respond to various requests.
Your available commands are:
Sieze
A task to attack and capture an enemy base/harbor/airfield.
Can only be placed on bases that allow capture.
Attack
Can be placed anywhere and will be completed once all the enemies in the area are eliminated.
Should be used to clear roadblocks and supply depots so that engineers and transport drivers can move and work freely.
It can also be used to pester the enemy anywhere on the battlefield.
Hold
Used to defend bases and/or harbors from capture by the enemy.
Resupply
A task for the Engineer and Transport groups to prioritize which bases to deliver supplies to.
This task will generate automatically based on the Logistics Station instructions (see below)
Build
Automatically generated when there is an unbuilt composition placed in a base.
Recon
A task with a wide variety of options and no predefined completion parameters.
Use it to discover enemy bases outside of radio range, scout known ambush locations, and gauge enemy numbers.
Has to be manually confirmed by the commander upon receiving information from the assigned squad.
The rank progression of the Recon task is on a 5-minute cooldown timer to prevent rank progression exploiting.
Establish base
This task gives engineers the green light to build a command tent within a one-hundred-meter radius of the task's location, establishing a new forward operating base (FOB)
Can also be requested by engineers, but has to be confirmed by the commander.
Placement is limited.
Bases cannot be established too close to other bases, harbors, or airports.
Bases have to be established within the radio range of your network (Keep in mind that receiving and transmitting distances might differ)
Once a base is established, it can also be captured by the enemy.
Dismantle base
Exclusive to Engineer groups.
Permits the engineers to dismantle the HQ tent after dismantling every other composition on the base, effectively deleting the base from the game.
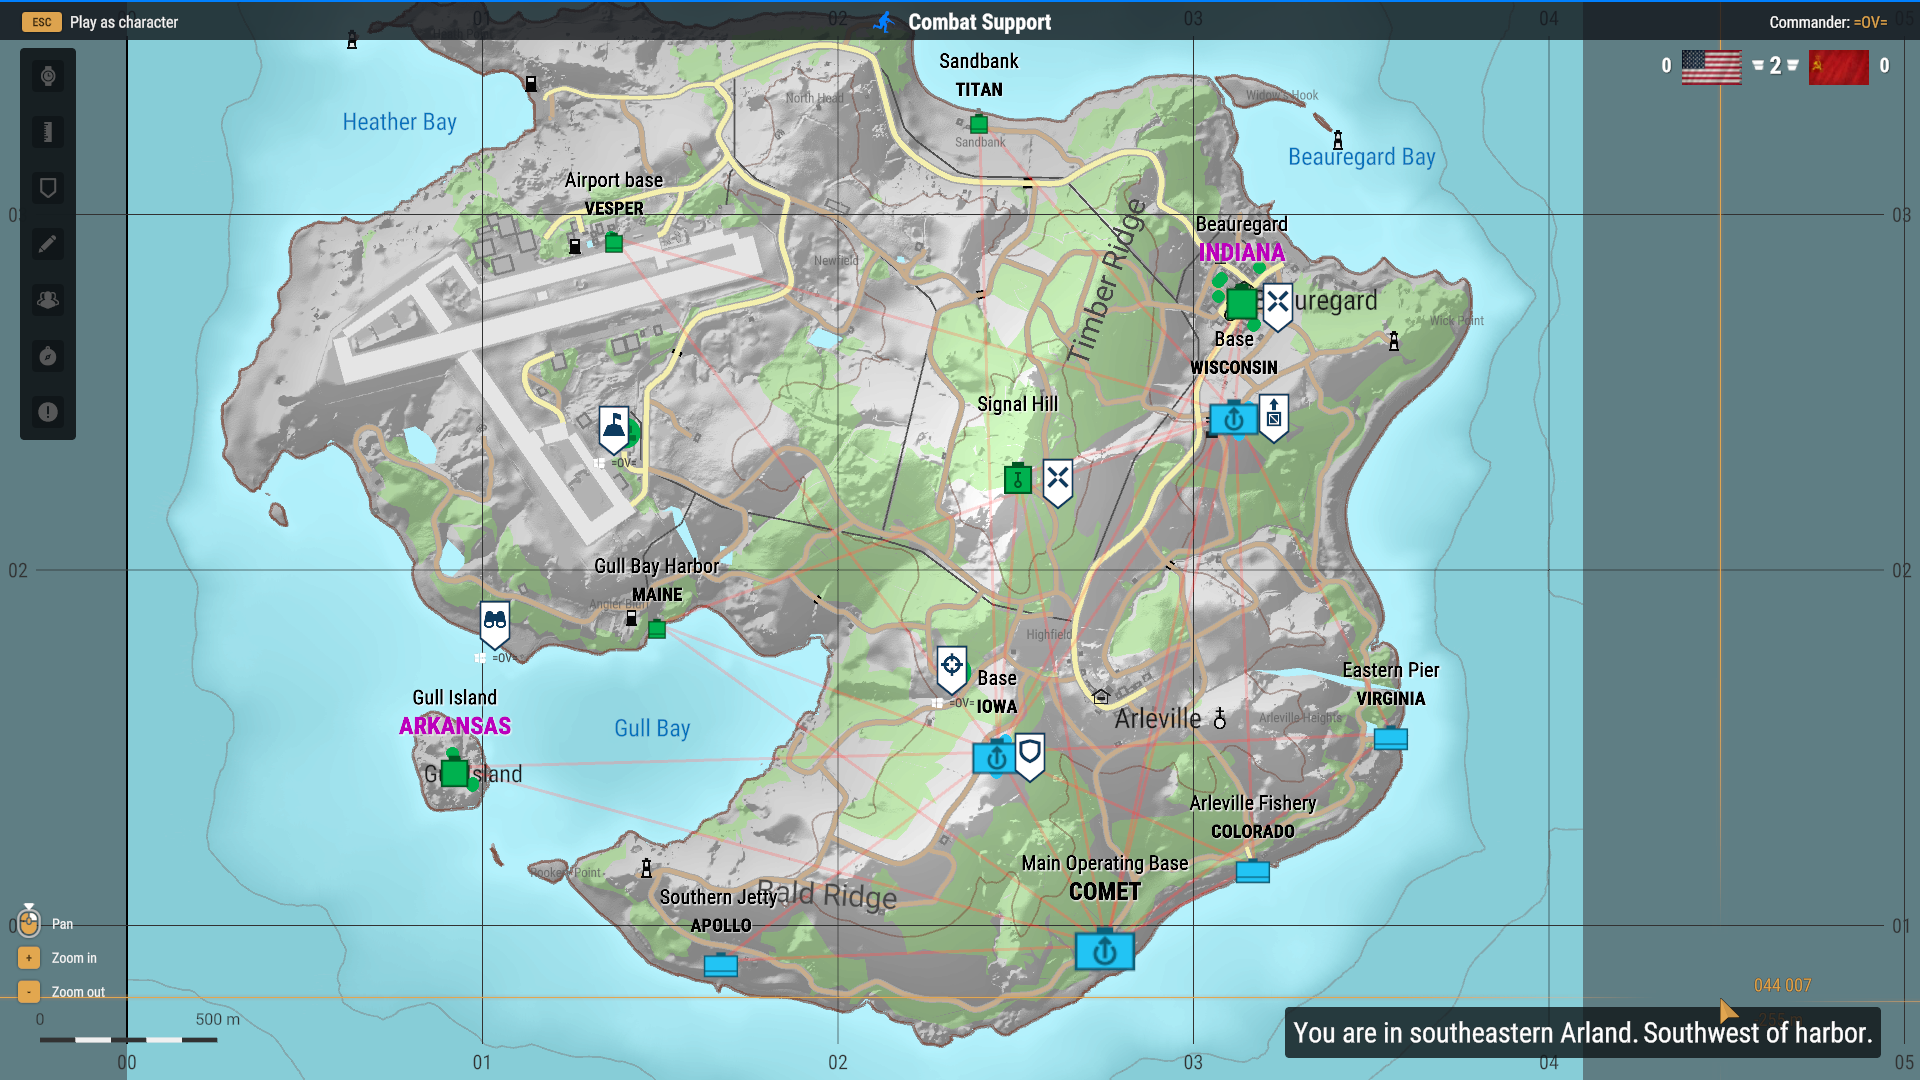
In the picture below:
Signal Hill and Beauregard [Indiana] are tasked to be seized.
Wisconsin is low on supplies and has a Resupply task.
Iowa is an important FOB and needs to be defended. It has a Hold task on it.
The supply cache northwest of Iowa is often guarded by FIA guerrillas, so there is an Attack task on the location, indicating assault groups need to clear it.
A Recon task has been placed on the beach north of Gull Island [Arkansas], as it can be used as the enemy's staging area for an assault on the island.
An Establish base task is placed in the military site north of Maine to get a better foothold over Gull Bay and the airport.
Commands are enabled via a radial menu after an RMB press (X on Xbox, Square on PlayStation). LMB confirms radial menu selections, RMB goes back one step. On consoles right stick navigates the radial menu, the right trigger (R2) confirms the selection, and the left trigger (L2) goes back one step.
Each task can be assigned to multiple available groups. Some groups are limited to tasks only relevant to them. For example, Engineers can't see Recon tasks, or assault groups can't see Resupply tasks.
Tips for task creation:
Keep your platoon occupied.
Give out plenty of tasks. Each completed task progresses the assignee's rank as well as the commander's.
No tasks available slows down everyone's rank progression.
Engineers cannot establish new bases unless a task is available.
AI transport groups do not deliver supplies unless tasked to do so by setting up Logistics correctly (see below)
Use tasks to direct your troops in certain directions.
For example, creating plenty of tasks on the west front indicates a westward push. Fewer tasks on the east side indicate there is no need to concentrate forces there.
Assign tasks to the most appropriate groups.
A single-person assault group has a little chance of seizing an enemy Capture Point. You can also assign multiple groups per task.
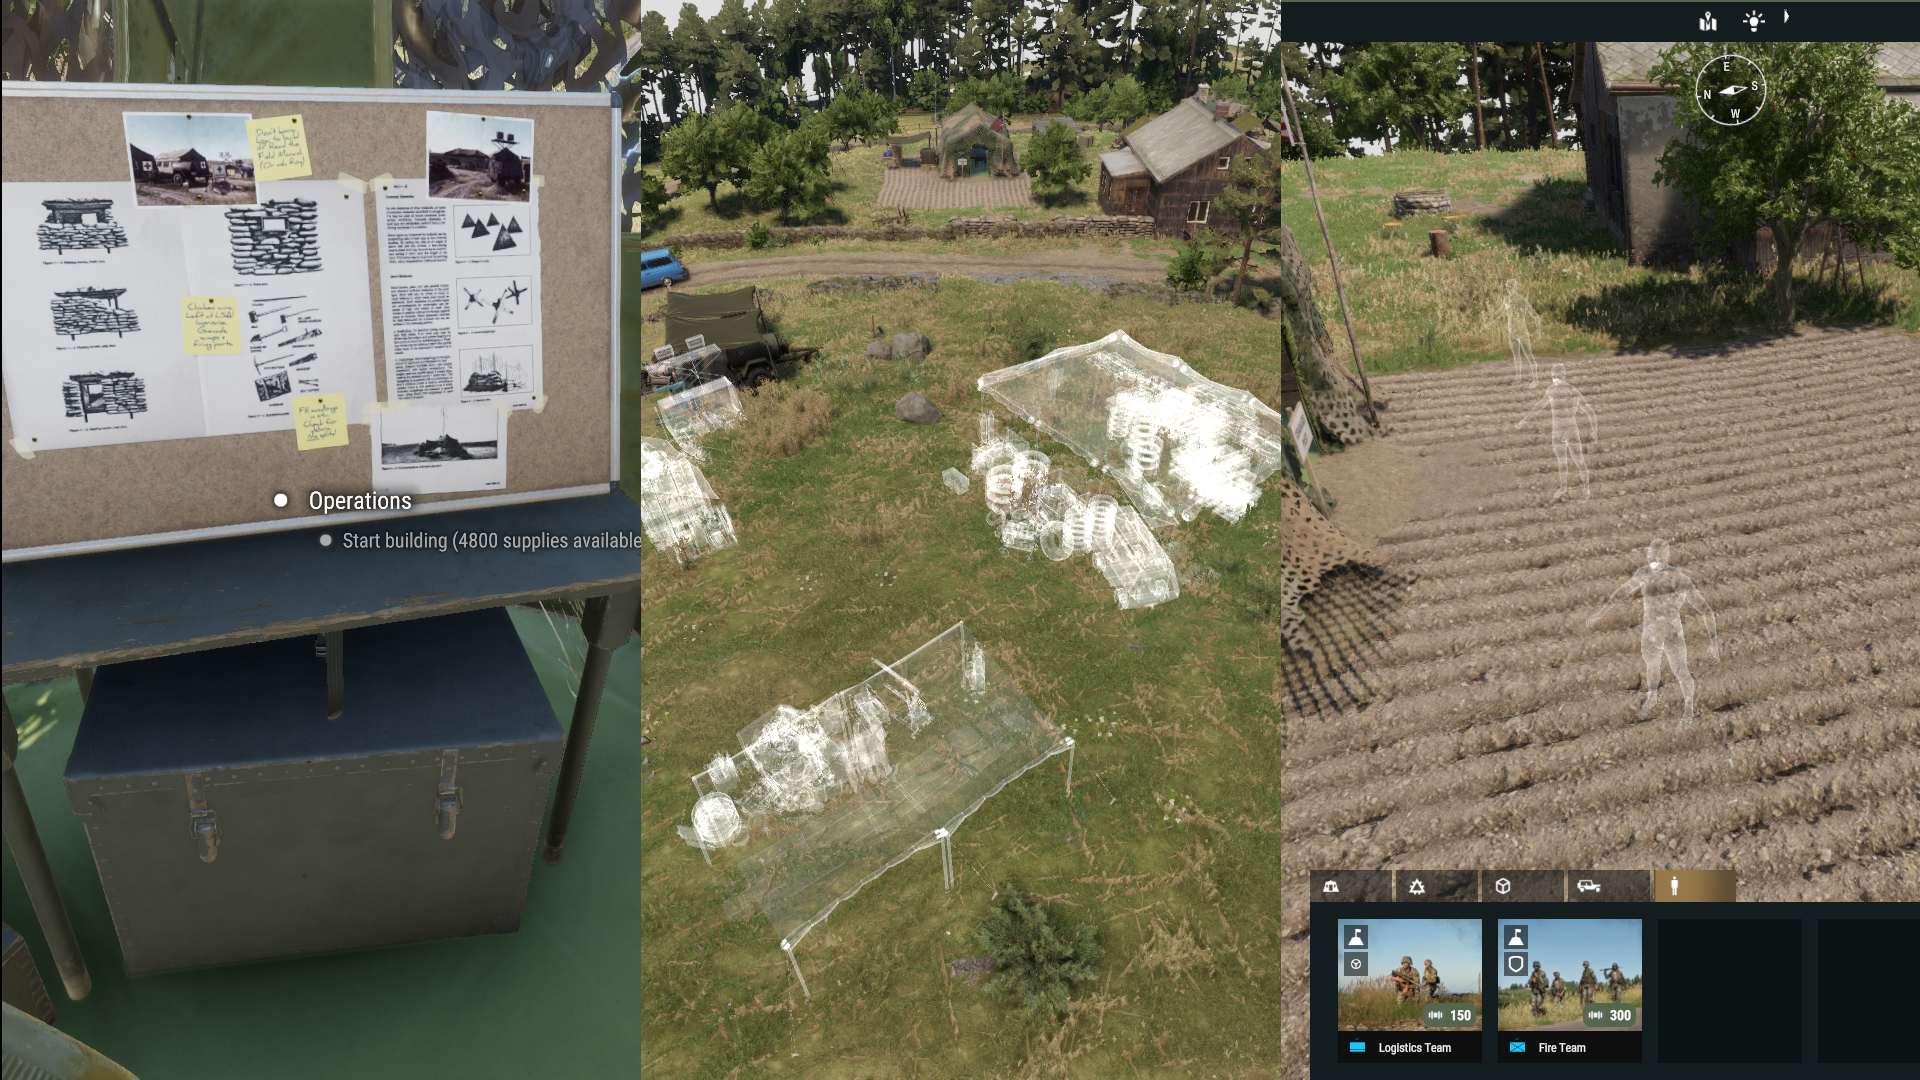
Operations
Available in the same location as the base's build mode. Operations lets the commander remotely access any of the faction's bases. You can place down compositions, defences, spawn AI defenders and transport groups, issue vehicles to players and AI logistics drivers, or just observe what is happening in the base as long as there is no enemy nearby.
AI spawns are limited according to the size of the Living Quarters built.
Small Living Quarters allow for Fire Teams (Defenders only, cannot be recruited by other players), and Logistics Teams (Used for supply transport)
Large Living Quarters allow for all other AI teams (These can be recruited by group leaders)
Vehicle spawns tie to Maintenance Depots available.
All structures placed by the commander still have to be built by players using their entrenching tools.
Logistics
This station controls the flow of supplies from the available source bases and between bases. Use it to coordinate supply routes, prioritize, and stay up-to-date on your AI logistics teams.
Each Control Point and FOB has its own Priority and Supply Limit. Should the base's supply numbers drop below your set limit, an automatic Resupply task is created, notifying both player and AI logistics and engineer groups.
AI groups choose which Ressuply task to deliver to, depending on multiple factors:
Priority selected
Distance if multiple bases have the same priority
Number of supplies available in the destination (Bases with fewer supplies get prioritized)
You can manage AI supply drivers using the vehicle icon on the left side of the control panel. Each group shows current activity, destination, condition, and source base selected by the commander. You can see whether they need a vehicle, or if their vehicle is full or empty.
Reasons why AI logistics groups may be waiting:
If you see an AI transport group with an empty truck waiting, see if their source base has any supplies available. They might just be waiting for the next shipment. Assign them to a different source base.
If you see an AI transport group with a full truck waiting, check all of your bases' Supply Limits and their supply storage capacity. They either have nowhere to store the supplies, or there is no task available as the supply limits have been exceeded.
AI transport groups do not share tasks. If you have two bases with a Resupply task available and three AI transport groups, two of them have the tasks assigned, and the third group will wait for a different resupply task to become available at a different base.
The islands are under FIA control at the start of each round of Conflict: HQC, and that means numerous ambushes, roadblocks, and minefields on the roads.
Instruct your assault, and/or recon groups to clear the roads using your Attack tasks and to dismantle any pre-built roadblocks using their entrenching tools.
AT mines can be disarmed. When players can, they shouldn't just drive around, but stop, clear the area of any lurking FIA guerrillas, and disarm the mines.
Clear roads will make logistics considerably smoother and more effective.
In certain situations, AI logistics crews may become stuck. While we are working on fixes to this issue, we would recommend sending us feedback with detailed steps to reproduce the situation via our Feedback Tracker.
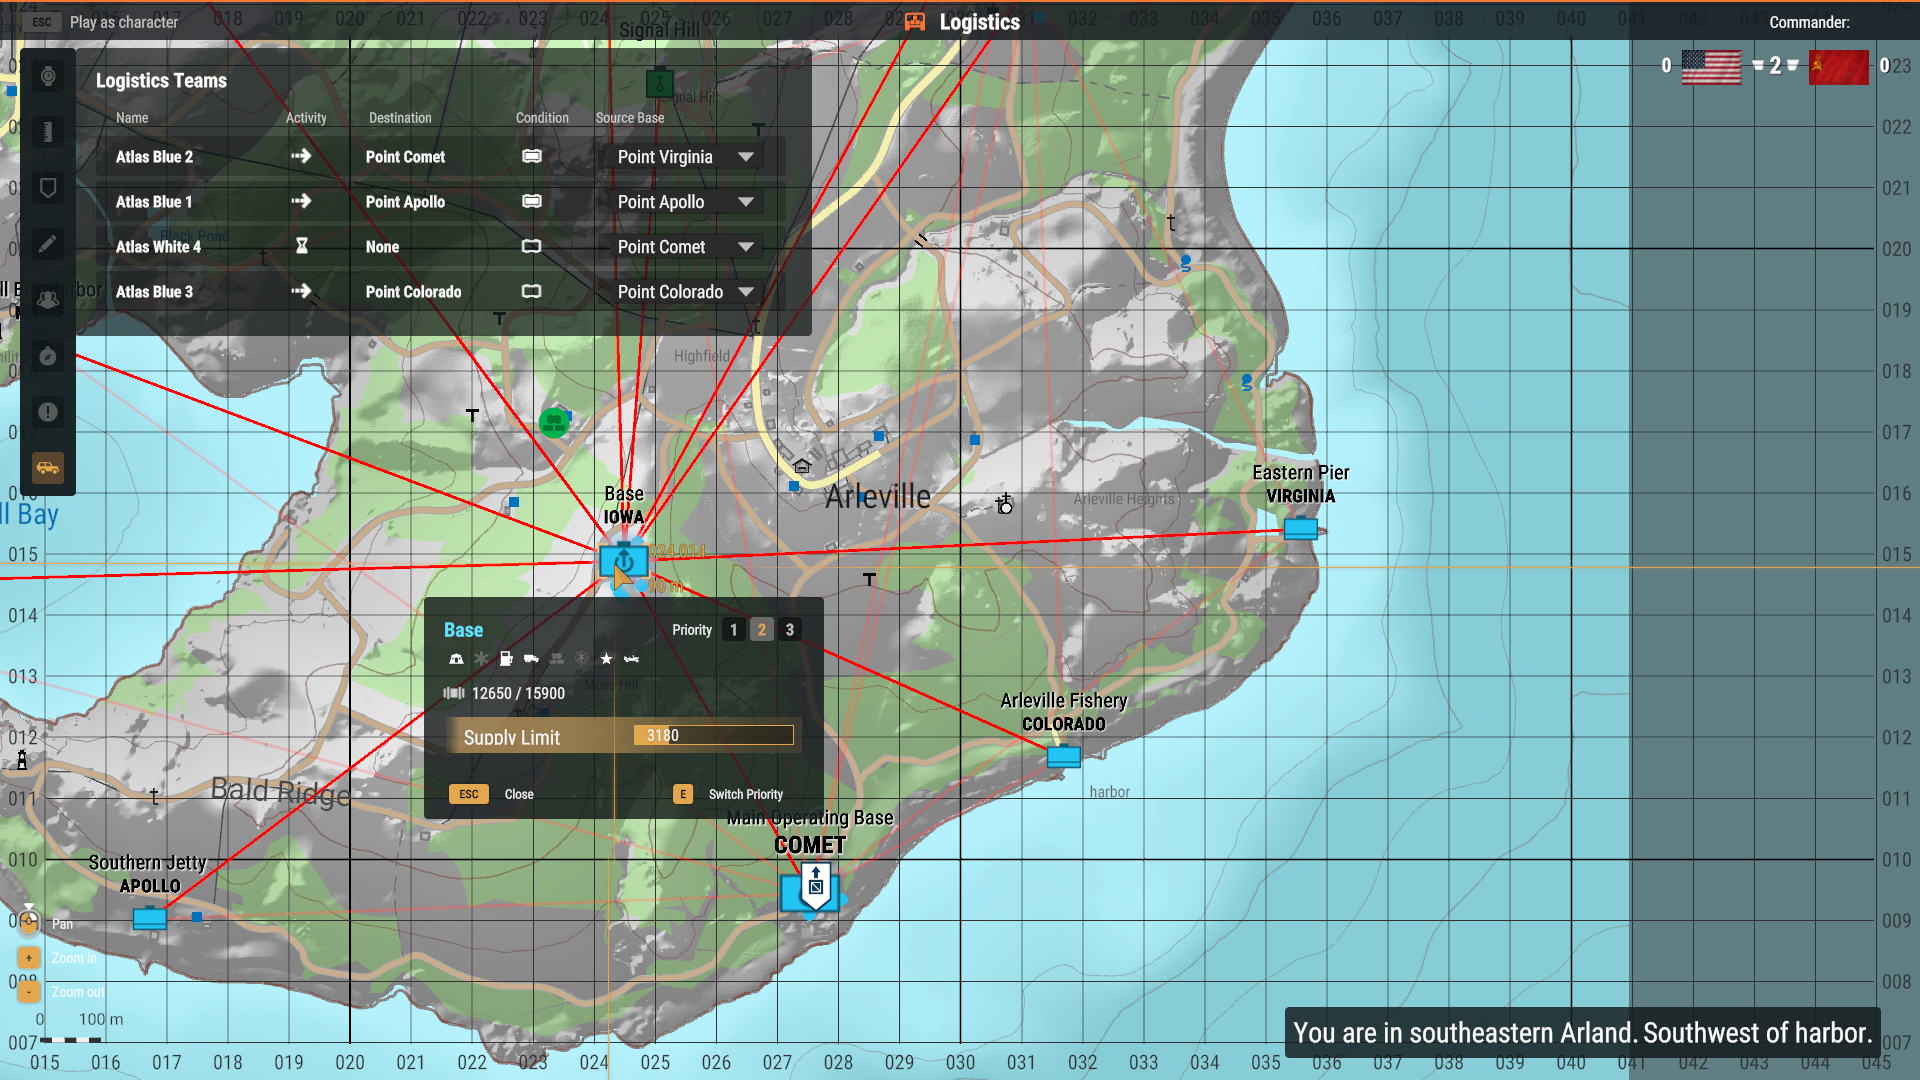
In the picture below:
Atlas Blue 2 is en route to Point Comet with a fully loaded truck from Point Virginia.
Atlas Blue 1 is loading up at Point Apollo.
Atlas White 4 is waiting with an empty truck as their source base (Point Comet) is low on supplies. Indicated by the Resupply task available on Point Comet.
Atlas Blue 4 has an empty truck and is en route to Point Colorado to load up.
Point Iowa is priority 2, currently holds 12,650 supplies, can overall hold 15,900 supplies, and the supply limit is set to 3,180. As long as the supplies stay above 3,180, there will be no automatic Resupply task created, and AI drivers will ignore it for now (Unless it's set as a source base)
As you can see, a commander is a vital piece on the Conflict: HQC chessboard. Whether the commander leads well or not can decide the entire game, and whether the entire platoon's efforts will lead to a victory or a loss. Take command, show us your best strategy, and lead your troops through a successful campaign.
If you need any more clarification, reach out to us via our Feedback Tracker or on our Discord in the channel #reforger_conflict.
Other In-depth Boot Camp Articles:
Gameplay resource hub
How to set up your own server
How to keep yourself and your teammates alive and effective
Advanced course on voice, text, radio, and map communication