


Welcome to a guide to efficient terrain creation workflow in Enfusion Tools for Arma Reforger. Terrain Creation is possible only on PC!
Before we begin - you'll need these basic tools:
- Enfusion Workbench
- an image editor like Photoshop or Gimp or similar; even Paint can be used, but it won't be very easy
- a plan
- free time in the foreseeable future to be able to make your dream project
- a browser window opened on the BIKI section on World Editor
- a third-party terrain generator like Instant Terra (my personal favorite) is next to essential and will save an enormous amount of time.
L3DT was the most popular one for Arma 3 terrains but seems to have been discontinued or abandoned now; hopefully, there are many different ones.
Goals
- teach workflow
- to get the best terrain in an iterative way
- if multiple people, use repo
- artistic approach
The goal of this guide is to be a suggested, efficient and fast workflow in order to create a terrain for Reforger; this workflow is as close to the Bohemia Interactive environment team's as possible, translated down to how a single person or a couple of friends can make terrain on their own.
This should help you obtain a fully playable terrain iteration quickly, which you can endlessly refine and iterate on as you want. Making a terrain that's good quality and works as it should takes a long time but making a playable one you can use as a platform to develop on can be very easy. You'll need to adapt your workflow to the number of people with whom you intend to work if you're not working alone.
It's recommended, whether working in a team or alone, to use a version-controlled repository to be able to cooperate and revert at any time.
We'll be following an artistic approach where the objective is to get as many puzzle pieces on the table as possible and then arrange them as we need as per our requirements.
We'll try to get rid of as many tedious parts (depending on the type of location you're making) as possible by planning ahead.
Anybody with some artistic inclination will find this workflow familiar as everything we do translates to painting a picture, including setting up the canvas.
This guide will assume you're using a vanilla asset and texture libraries and won't be covering making your own structures/textures or working with modded content.
«You should be in the official Arma Platform Discord Server. All the information in this document and much, much more has been discussed and expanded upon there, and all the legendary terrain makers from the Arma community are in there, as well as the Arma devs. If anything in this guide is unclear, please post your question there or search the chat logs there for related things. There are no stupid questions when trying to learn. » — blud
This document doesn't cover the in-game 2D map view.
Vocabulary
The word Map, as used in this document, refers to an image map with data but also to a picture file with a shape or gradient that's used to define various elements of the terrain itself. Examples are height maps, satellite maps, etc.
The Terrain is what you'll be creating and sculpting.
The World is the container to the terrain, entities, and other components (e.g., Weather).
Terrain Data
The absolutely most important thing before we start making our terrain is understanding the data that goes into it. There are three main components: Heightmap, Rasters, and Layers.
Height Map
Also called height field, Digital elevation model (DEM), and other words that are interchangeable for our purpose, this is the data that defines the shape of our terrain. You can also get rasterized height data from various sources, but we recommend converting those using a GIS program.
This guide won't cover sourcing real-world data.
In the game engine, the height map is a coordinate system with fixed squares, and the only variable is the height.
There are many places to get hold of real-world data. Licensing and rules will apply to each one. Some software can download and convert various data, including roads, as well as a heightmap and sat imagery, and other vectors that can help you.
This will require knowledge beyond what this document is intended to provide.
The first place to start looking into real-world data would be to use QGIS, OpenTopography, and other various software that can work with such data, export it to formats that Workbench's World Editor can read, and you can use that as your foundation.
It's entirely possible to start out with a totally flat ground plane in Enfusion and sculpt everything by hand, but this isn't recommended. You should at least look into using software designed for generating or sculpting game terrain landscapes.
The sample island files already include a height map we can use for this guide.
ASC Format
The ASC format is a text-based file format that simply stores these coordinates. With it, we can import and export the data between different software, make edits to small areas and import them back into Enfusion and every little detail except the area that was changed remains the same.
Image Format
When using an image format for this, the data isn't lossless, and color curves and color space are things that affect it. Many editors work with image files for this purpose.
Due to the scale and detail level of Arma terrains, ASC is preferred because it's the best at retaining detail losslessly over unlimited iterations and using multiple tools.
Rasters
These are your SOURCE image files that distribute surfaces onto the terrain geometry and your satellite map or your height field if you're using an image format for this. When these are imported, they'll turn into data that the game can understand.
This happens entirely automatically, and in this process, your source rasters are turned into the textures we see in the game.
In some cases, we can also export this data so it can be processed inside another software. We'll cover this later when we start setting up our first terrain.
Rasters are image files, usually TIF or PNG. When the tools import these, they're turned into smaller files that the game engine itself reads when showing the world on your screen. This is why we refer to rasters as source files, and the terms are often used interchangeably.
The satellite map in Enfusion has a slightly different purpose than in Arma 3.
In Enfusion, it simply provides the basic color of the land (albedo), as the engine does all the shading itself. There should be no actual satellite images used on your final terrain, but it's great to use one as a template for where to place objects when making a terrain based on the real world.
More on this later.
The most important rasters are the surface masks. These are big, grayscale images that define where each surface, grass, rock, forest, asphalt, etc., is painted on the ground. This works where black means 0 coverage and white means complete coverage.
The masks are much more powerful than before since the distribution is in a range from 0 to 1 and not like in Arma 3, where you either had one surface or the other.
Here the surfaces can be blended and mixed, but there are limitations.
Most importantly, each block can only have 5 surfaces total, and 5 you can pick depending on which are used in the surrounding blocks. We'll expand on this later in this document.
The sample island files contain a basic sat map.
Object Layers
The layers are text files that contain all of the information about the objects you place, the terrain configuration, and all the generators like forests, roads, water, etc. Each layer created in World Editor is one file.
The default layer should, by convention, be named "default" and contain only the parts that are required for your terrain to work. More on this later. You should never use the default layer for object placement, generators, and the like.
Occluders should be in their own layer if placed manually.
Toponyms should be in their own layer.
Each settlement should ideally be in its own layer, but some overlap is natural.
It's very important to keep your layers neat and tidy. Especially when working with others. When cooperating with others, it's important that nobody works in the same layers!
Data Management
It's very important to set up data properly before you start so that you can keep track of everything. Here it's vital to separate your source data and your game data.
It's a good practice to keep your directory structure close to this setup:
It's important to never keep your projects inside the Game or Tools directory — these are "temporary" directories than can be cleared/corrupted by Steam.
The project files can be in any directory; the default Workbench mod directory is %userprofile%\Documents\My Games\ArmaReforgerWorkbench/addons .
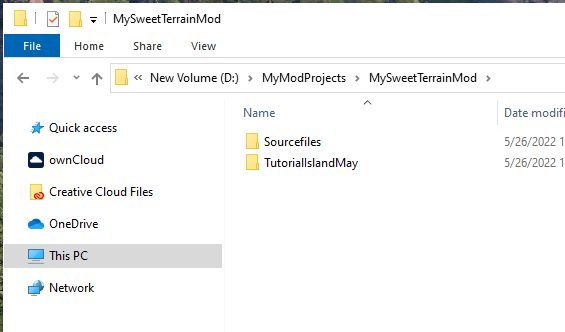
In our case, D:\MyModProjects\MySweetTerrainMod\ is the root folder of the project. If you have additional directories for your mod with textures, models, etc., you should place them here.
\Sourcefiles\ is where all the source data goes. You should put all your source rasters, Photoshop files, etc., in this folder. Every time you edit rasters in another software, they should be saved and kept here. The data that Enfusion Tools generates inside the game is made from this data. Keep your source texture files and rasters here. You can also use this folder to save your related Photoshop files and research, and anything that belongs to the project but isn't included in the game files.
The source folder should always contain the most recent edits of masks.
Remember that if you re-import a mask, you lose all the surface painting you did, so remember to export the latest changes before you edit them in other software!
\TutorialIslandMay\ is where the game file "addon.gproj" should go. It's where we save our files in Workbench. The Enfusion Tools save goes in this folder and will create the needed subfolders when you import your rasters. Its name doesn't matter.
Note that all the files in this directory will end up in the mod files - think of the file size; keep the sources away from the gproj directory.
Project Planning
With Enfusion's new tools, we can make terrains much faster and more efficiently than before. The most important part is what to prepare for and in what order to do things.
For the first-time terrain maker, it's important to start small. Your first terrain should be a test platform where you learn how everything works. This test project can also help you troubleshoot later should anything break!
Even if you're using our sample source files to learn the process, it's a good idea to keep them around when you plan out your big dream project after learning the basics.
Since we don't have the major logistical problems of RV/Arma 3 in Enfusion, we don't have to wait for hours to see our terrain in-game and walk around on it. Everything else is also much more efficient. We no longer have to include waiting for hours in our workflow. You can place a nice village layout in a few minutes, walk around and see how it feels, then start adding the details. A few hours later, you can have a complete village with dozens of houses and gardens that look great. You can place a village, houses with yards and gardens and driveways, press play, and then test it right away on foot in-game.
Research
At Bohemia Interactive, we do major research long before we start actually working on a terrain. This contains all the information we need to start laying it out. This involves cultural, logistical, flora, fauna, biome, geology information, and anything particularly important for the area we're (re)creating. Most often, our landscape is taken from the real world and adapted to our needs, like turning inland into islands or taking one side of a river valley and turning it into a coastline (Chernarus). We'll also most often scale the real data down to manageable sizes, as well as to fit within the limitations of the engine. For instance, using a 40m resolution source dataset will require a lot of processing to look great when resampled to 2m resolution, which is the target in Enfusion.
Gather reference imagery, and read up on the science of why a particular landmass is how it is. If you're creating a real-world location in any way, combining or freehand working, you need reference imagery. We use thousands of those. Research is the most important job of the environment designer, other than the ability to work with the tools in order to make a good terrain.
Terrain Files Setup
In Enfusion, it's not important to have any of the source files in the same resolution. Each surface has one grayscale mask, which can be resampled on import, exported, edited, and re-imported at any time we want. Just remember that with the masks, any surface painting you do will be lost if you don't export the latest versions.
Height Field Import
Similarly to Arma 3, we recommend using the ASC Format in the Workbench.
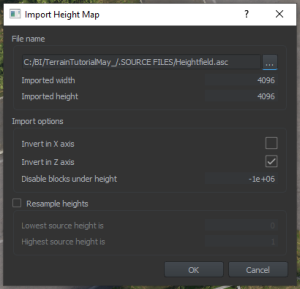
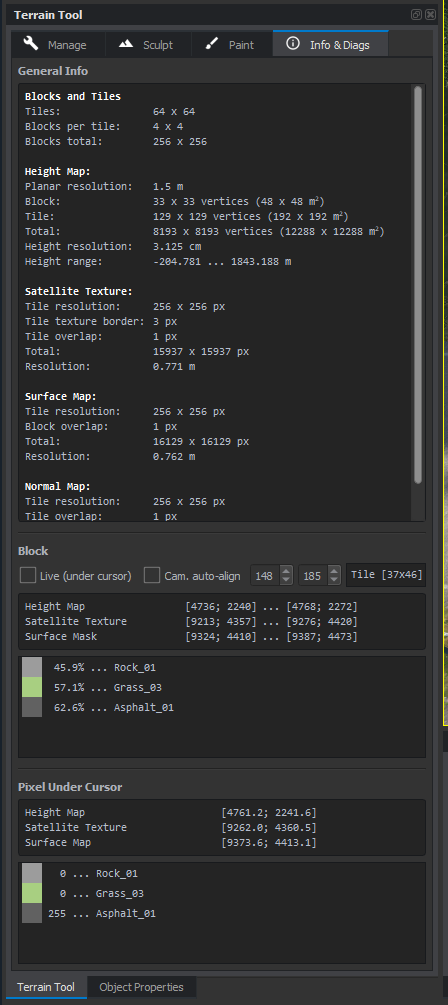
These are the settings for our sample terrain files:
| Parameter | Value |
|---|---|
| Planar resolution | 1.5m |
| Block | 33 × 33 vertices (48 × 48 m²) |
| Tile | 129 × 129 vertices (192 × 192 m²) |
| Total | 8193 × 8193 vertices (12,288 × 12,288 m²) |
| Height resolution | 3.125 cm |
| Height range | -204.781..1843.188 m |
These are similar to the ones used on Everon, and we recommend staying as close to them as
We don't recommend going too far from the values internally used, as engine-side optimizations and QA are done with our particular settings in mind, and some edge-cases may appear in unexpected scenarios. Things may seem to go well at first, and you may get quite far in the progress before noticing the settings don't work for your case (e.g., too big file size, height steps, minimal value on a terrain with big altitude differences).If values different than set standards are required by the wanted terrain, be sure to experiment extensively.
If you're importing your own data instead of using our example terrain, try to aim for a 2m resolution. This is what we use, and you can be quite certain it will work for your terrain too. Having a lower resolution may imply problems such as imprecise distant terrain LODs, objects appearing to hover on distant terrain, rivers, and roads being more difficult to implement, the less ground detail you have, etc.
Our structures and other terrain assets are also designed to fit in a 2m terrain grid (e.g., the church crypt or the water treatment plant). With 3m resolution, these can be very hard to place and impossible at 4m without holes in the terrain.
Always save and reload your world in World Editor after importing your height field.
Pay close attention to the upper right corner of World Editor every time you save - don't work on the terrain while this loading bar is displayed:
 Once it has disappeared, reload the terrain.
Surface Mask Setup
Main Usage
We've included some masks in our sample terrain. These cover basic nature. To use them, we must first add some surfaces in our project to which we can assign the masks.
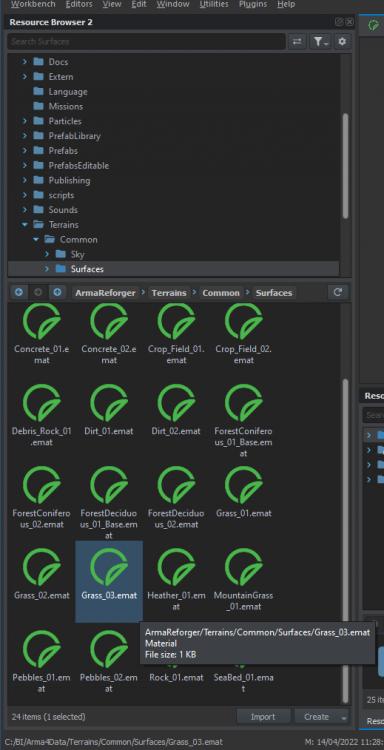
We can find the surface files for Everon in the Reforger game files using the Resource Browser.
 We start by using a proper surface for the default one. The default texture always covers every block 100%.
If you remove a surface, the default one is the one that will show up instead. In our test project, the default one is rock_01, so go ahead and right-click the default to replace the surface.
The rock one is used as that's the bottom one and the second most used texture.
Grass grows on top of it, so we'll add grass_03 to it as the second surface.
Grass_03 is the surface we use for wilderness on Everon.
Next, we'll add more surfaces in the order we would like to have them - this is a personal preference based on terrain and usage.
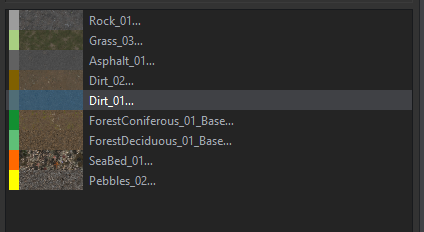 For our example terrain, we want them as shown above.
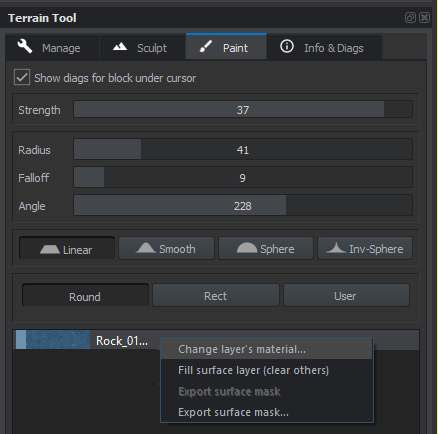
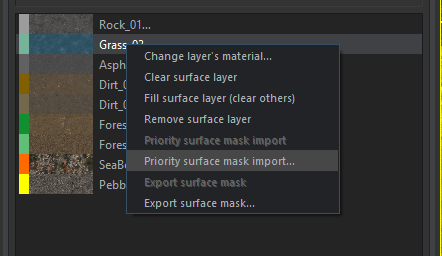
Now go ahead and import the example project masks, each to their respective surfaces, by right-clicking and choosing "priority surface mask import."
It can be tempting to look around already, but you should save your terrain and reload it again first.
 Remember: let this finish before you do anything else!
This is the only annoying waiting we have to do besides AI navmesh generation.
Remember: let this finish before you do anything else!
This is the only annoying waiting we have to do besides AI navmesh generation.
There are some very important things to know about surface masks:
You can have a maximum of 5 surfaces in each block. Blending more than two or three can be difficult. Which 5 you can use also depends on which ones are used in the surrounding blocks.
We recommend only using 3 basic surfaces to start with. Use those when generating your first masks, whichever way you choose to do so.
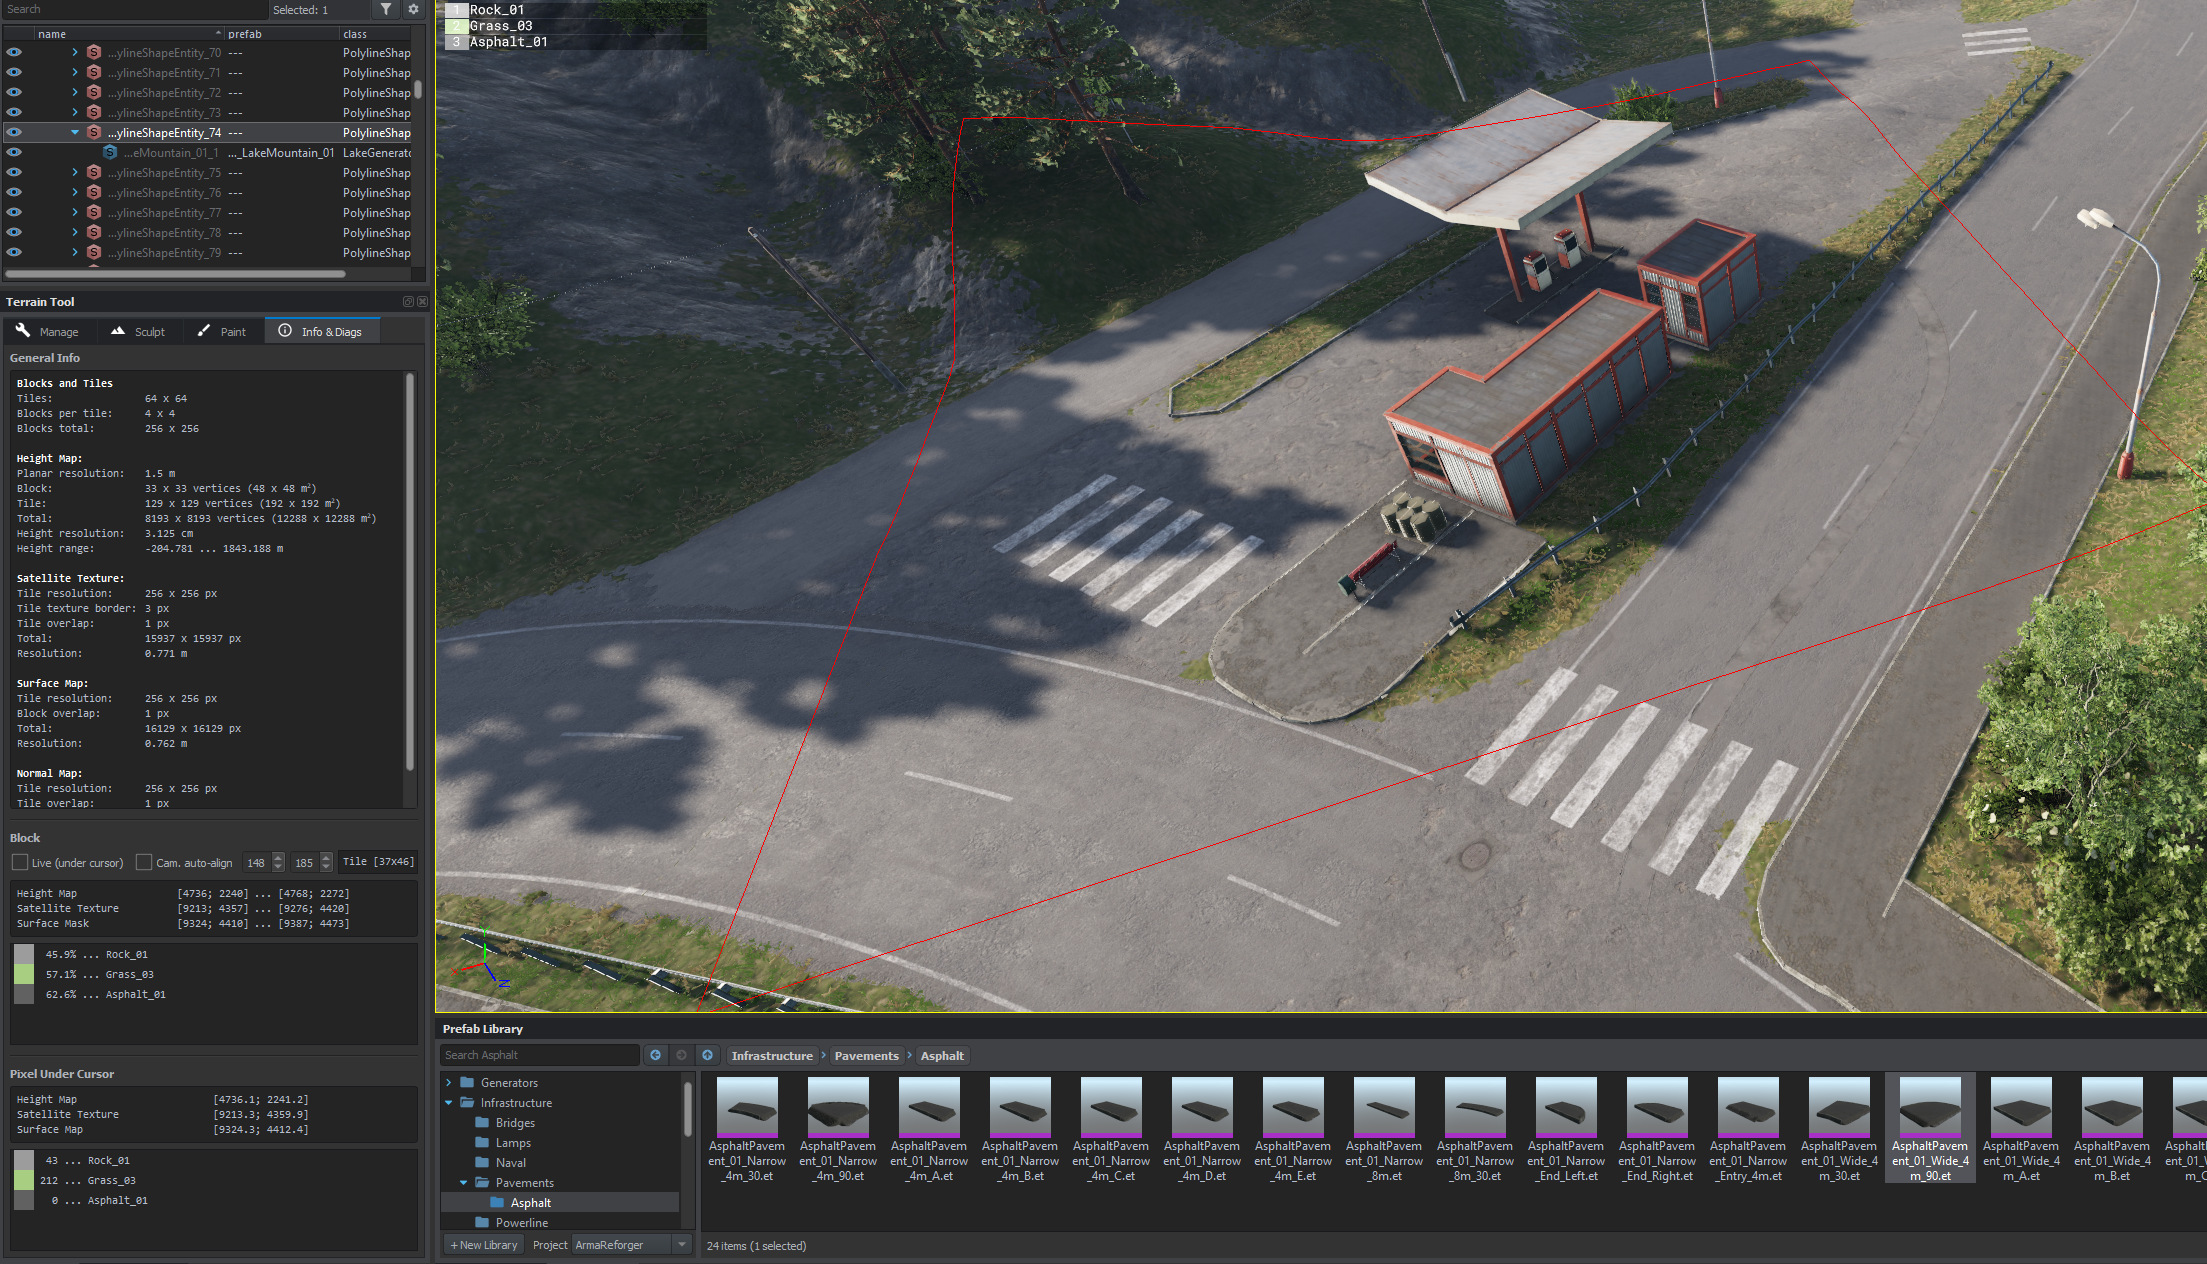
In the terrain tool, you can hover with the mouse using the "Info & Diags" panel to get all the information you know about each block.
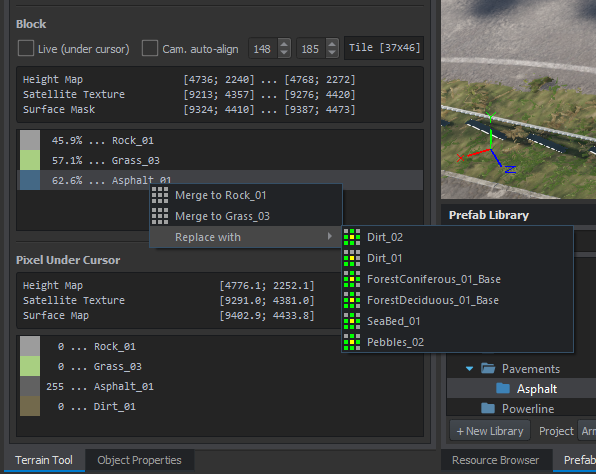 Right-click the surfaces in use in your currently selected block, and you'll find functions to replace or merge them with other surfaces.
It's recommended to spend some time at this point to get familiar with how to paint and how the different surfaces work together. Try painting some random surfaces on our sample terrain to familiarize yourself with how this works. When you have 5 in a block, try to merge them, etc.
Right-click the surfaces in use in your currently selected block, and you'll find functions to replace or merge them with other surfaces.
It's recommended to spend some time at this point to get familiar with how to paint and how the different surfaces work together. Try painting some random surfaces on our sample terrain to familiarize yourself with how this works. When you have 5 in a block, try to merge them, etc.
« I would recommend limiting yourself to 3 surfaces on the whole terrain when generating your masks using external software. It may not seem like a lot, but it's much easier to handle the next surfaces and to blend. Select the most prevalent natural surfaces in your biome and try to generate nature using those. The less we have to juggle mask limits around later when we start working on the detailing later, the better. It's faster to brush something by hand than to manually fix saturated areas afterward. Another tip is if you have to generate complex surface distribution, roughly paint it out on your map using a giant brush and then export those. This is only to map out all the areas with the most important surfaces. Then use them to crop the masks you generate in other software to make them fit your needs. It's fully possible to generate all the masks, but it will take an enormous amount of planning and unlikely to be worth the time. » — blud
Secondary Usage
Now that you know how masks work, we'll use them for their secondary purpose.
Creating a rudimentary satellite map with which to start is easy and shouldn't be given much effort. In most cases, if your terrain is in a temperate climate with green vegetation, you'll have enough at this point with simply an image that's colored the same hue of green as your most common surface.
Usually, grass_03 and Ground_Granite_01 are used for the generic wilderness. The *middle_BCR of these surfaces looks like this:
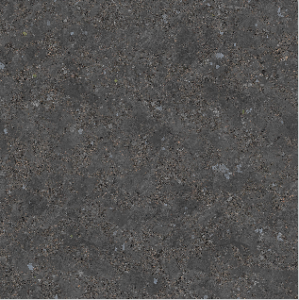
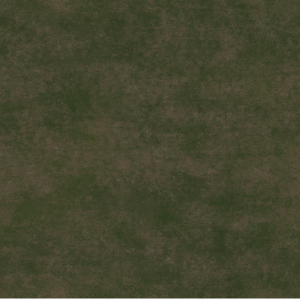
On our sample sat map, we have used these as a pattern to cover everywhere that has basic grass and rock.
Using any terrain generator software, you can extract data to 2D, such as slopes and convexity/concavity, as well as height from sea level and such. This is very useful for creating 2D masks for surfaces like bedrock or sand.
Later in the workflow, when we have done more mask work and started detailing, we'll go back to the sat map and add the things we need to make it look nice at a distance.
Quick satellite map in a few steps:
- Import the mask for your grass and the rock mask into Photoshop or any other image editor, each in their own layer in one document
- Fill each of them with the average colors of the images above. (Or define the middle_BCR of the surfaces as patterns in Photoshop and fill with those)
- save as png
We already did this for you and provided one already made in this way with our sample terrain. You can import that one in the next step.
« If recreating a real area, use the satellite image for your data location as the template to place objects on. If you're using our surfaces, you can blend this grass pattern with your sat map, and it will match a little better with the distance blending by overlaying it some 90% or so in Photoshop. If you're approaching this from Arma 3, forget what you know about satellite maps. More on this later in this document. At the end of this guide, there will be some tips for making the final version of the satellite map after everything has been placed and we're happy with our terrain! The final satellite map should be the very last thing we finalize for the release version of our new playground. » — blud
You can go ahead and import the sat map for our sample island from the source files folder now.
Import
Importing a satellite map is done with the World Editor's Terrain Tool.

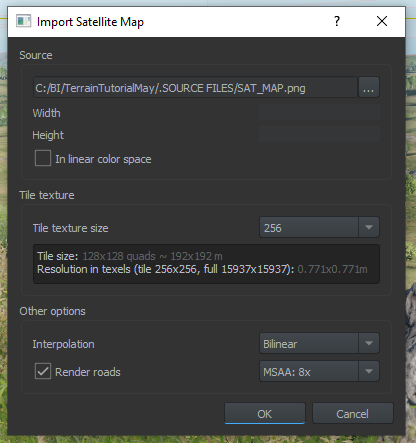
Select the location of the sat map, use the settings above and click OK to begin.
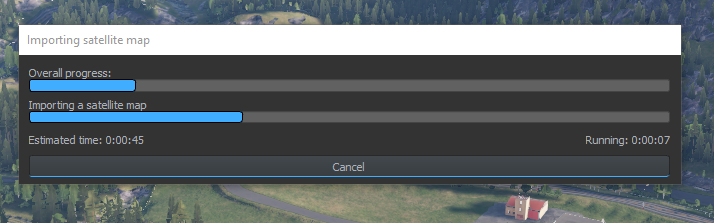 It will now recreate many material files, which can take a while, so pay attention to this progress bar in the upper right corner until it's complete.
 Again, wait until the progress bar disappears before doing anything. Save your terrain and reload it again.
Normal Map Generation
 In Enfusion, the normal map is regenerated every time you do anything that affects terrain normals, and you save your project.
If your height map is 2m resolution, you can have the same or many times higher resolution, and the normals will look the same; this is because the engine uses the height field to generate the normal map, and at this point, with our current implementation of normal maps, it will only ever be the same resolution data as the height field.
You only need one texel per vertice in the terrain mesh. Any extra resolution in the normal map is simply wasted space on your drive and in the mod size.
Save your terrain and let this finish before you do anything else, and we'll move on to the fun part!
 Reload your terrain, and we'll now move on to the fun bit. Placing objects! It's recommended to backup your project now.
Order of Operations
It's important to have a good method and workflow. Since we'll be making a freeform terrain, we must first decide on all the components we'll be adding. This is referred to as high-level design. Here at Bohemia Interactive, this starts long before the first prototypes of the terrains are made. At this point, we decide what sort of nature, biome, what kind of towns, industry, infrastructure, and everything appears in our creation. Having all these things on paper before starting saves us from having to redo things and adapt later. If you're recreating a specific real-world area terrain, your approach will be different as the high-level design already exists.
In our example terrain, one settlement is already planned out, nature has been designed and generated on the whole island, and all we have to do is fill in the blanks as we want them. It's never a good idea to process a terrain by completely finishing one area and moving to the next. Gauging performance issues will be impossible this way and must then be solved later.
Always start with the big things, like forests and settlements. If you need a major city, fill the area with structures of even spacing. Don't worry about pretty or functional for now.
We'll add all the small details and cool things later when we have our whole project working as a concept. The processes are explained later in this document.
Layout
- structures location & placement (docks, power plants, etc.)
- village location & building placement
- seabed landscape preparation
Population
- road network
- forest generators
- lakes and ponds
- rivers
- power lines
- shoreline
Performance
- occluders
Good Habits
There are many things to pay attention to and to do in order to avoid trouble later. Here are some.
Save often! If you create a polyline shape. Nice and detailed to match your settlement or such, SAVE! You do this before you apply the generator in case something goes wrong. If you put in weird parameters or anything crashes, you'll still have the shape and won't have lost much time other than reloading your project. Ctrl+S must become a reflex.
Backup as often as possible through your repository system or eventually copy the whole directory somewhere else. Preferably after each long work session. Did you back up your project yet?
Backup again. You can never have too many backups. Even of the individual components we added to the world when starting out, masks, etc., it's useful to back up your masks to files after every working session just to be on the safe side.
Entities Placement
Sketching out settlements/infrastructure/nature help to anticipate and solve performance implications, along with being a design template to be filled, following the usual steps: Concept → Prototype → Alpha → Beta → Final.
 Our Example Island has examples of most generators, sketched-out beginnings of settlements, and other things already in place.
Feel free to share it with your friends, build on it, raze everything, and make it entirely your own as a practice ground.
Vector Tool Practice
The Vector Tool is our best friend at this stage. It will be used for everything except deciding where buildings will be in this stage of the work.
See the Vector Tool wiki page for more information.
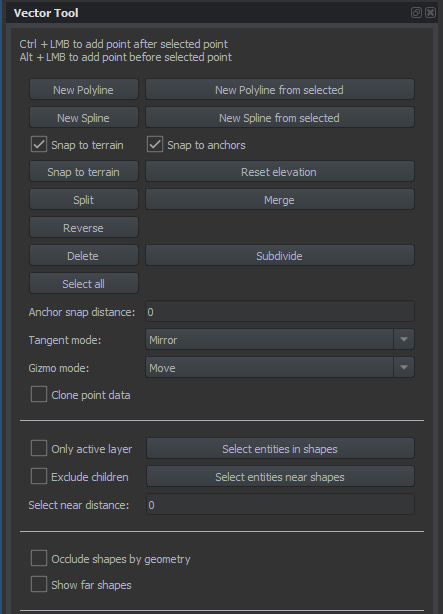
The important thing to note here is the difference between Splines and Polylines:
- The Spline is generally used for roads, rivers, streetlamps, crash barriers, and things that have to follow a smooth curve
- The Polyline is used to define more linear features as well as outline larger areas for use with forest generators, fences, curbs, and other things that are placed along a straight line.
Play around with the features for a bit. Try creating a polyline and a spline and see how they behave. Try selecting a vertice (point) at the end of one of them, hold Ctrl and click somewhere else to create another point, and draw the vector between.
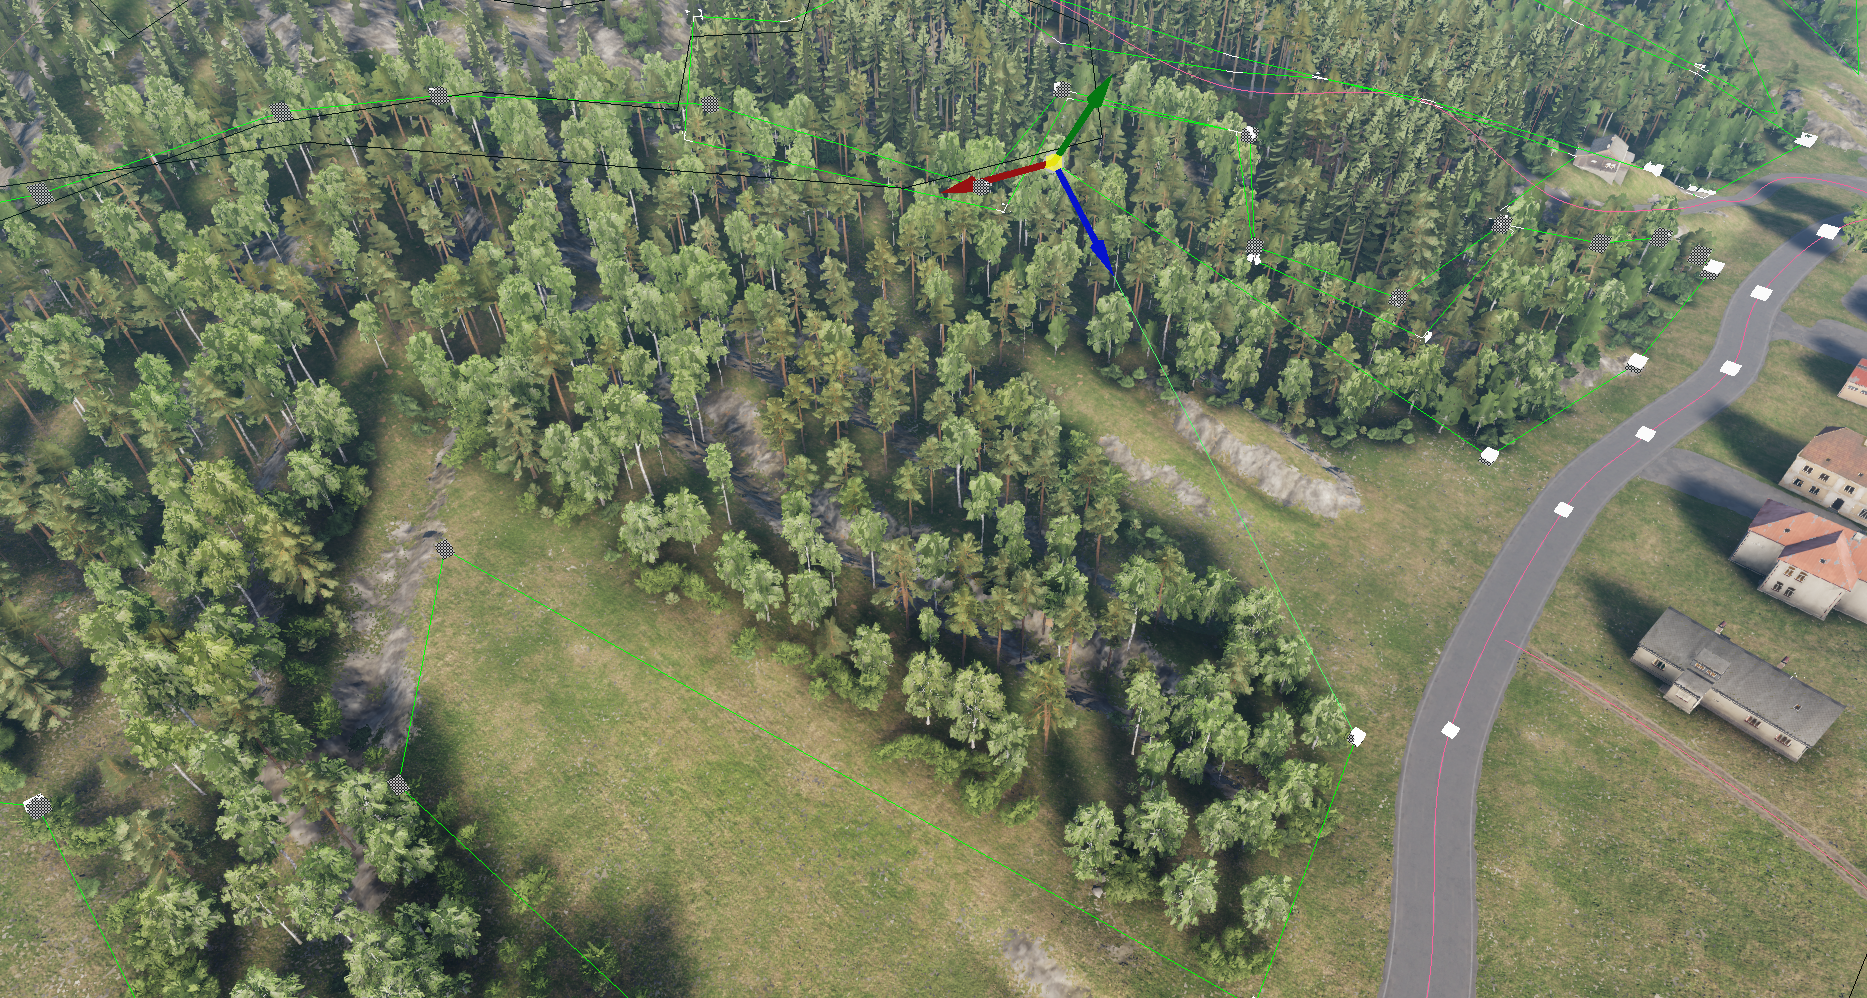
Here we can see a forest generator on a polyline shape where the vertice isn't snapped to the ground. This can be confusing as the generator distributes objects only in a two-dimensional pattern. Selecting a vertice like this and hitting the Snap to Terrain button will fix it.
It's always useful to pay attention to terrain-snapping, you'll usually want it turned on, but if you're using a road generator and want the terrain to follow the road vector's elevation (with the Adjust Height Map option ticked), you need to disable this setting.
The Snap To Terrain button is used to put the currently selected vertice(s) to the ground below it.
The next steps require that you have practiced a little with the vector tool, as all the generators are applied to either splines or polylines as you place them.
Our sample terrain has all the basic generators already placed, and you can have a look at those and modify them to see how they work before you read further.
Buildings and Structures Placement
Putting in some random houses where we'll need specific facilities, villages, camps, farms, and other areas is a good way to get started in zoning.
Go over the whole terrain and put down all the major buildings you think will be needed. Don't worry about the details or exact positioning because the big picture is the important thing at this stage.
If you want to be extra efficient, paint down some surfaces like crop fields and meadows, and put asphalt down to cover your industrial or city area. Quickly brushing them approximately where the farm or other site will eventually be is the goal.
Doing this early will also help us with future mask work in the settlements, where we then simply need to add the details.
See a spot and want a nice village here later? Put down a number of houses approximately where they should be with enough spacing for future gardens and such details.
Add some patches with cobblestone ground texture or asphalt where you just put that supermarket object; then add a few roads in different directions in a reasonable pattern. Move on to the next area quickly.
See a good location for a beach resort? Put in some cabins and shacks there. See a mountain that definitely needs a radio tower? Go ahead and place all these landmarks now in their future general location.
Lighthouses are important. Research how they work in the real world and place them according to what you learn. Don't bother with the details yet. This will help us get an idea of how to connect things, and our terrain will feel lively already from the start.
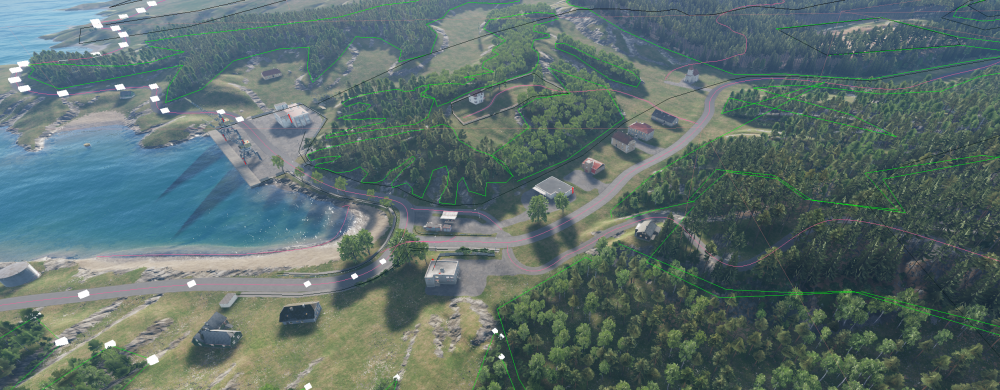
We may need an airport somewhere. Our sample island already has the basis of one laid down. Did you make a harbor/port yet? We'll put one here.

We'll start by placing some of the buildings we need in the area and then put in the quays and piers.
Our high-level design states this area needs to be a fishing village.

The first thing to do is level the seafloor to make it deep enough that ships could actually go in there. This is easy with the "Sculpt and Smoothing" tool. See the wiki.
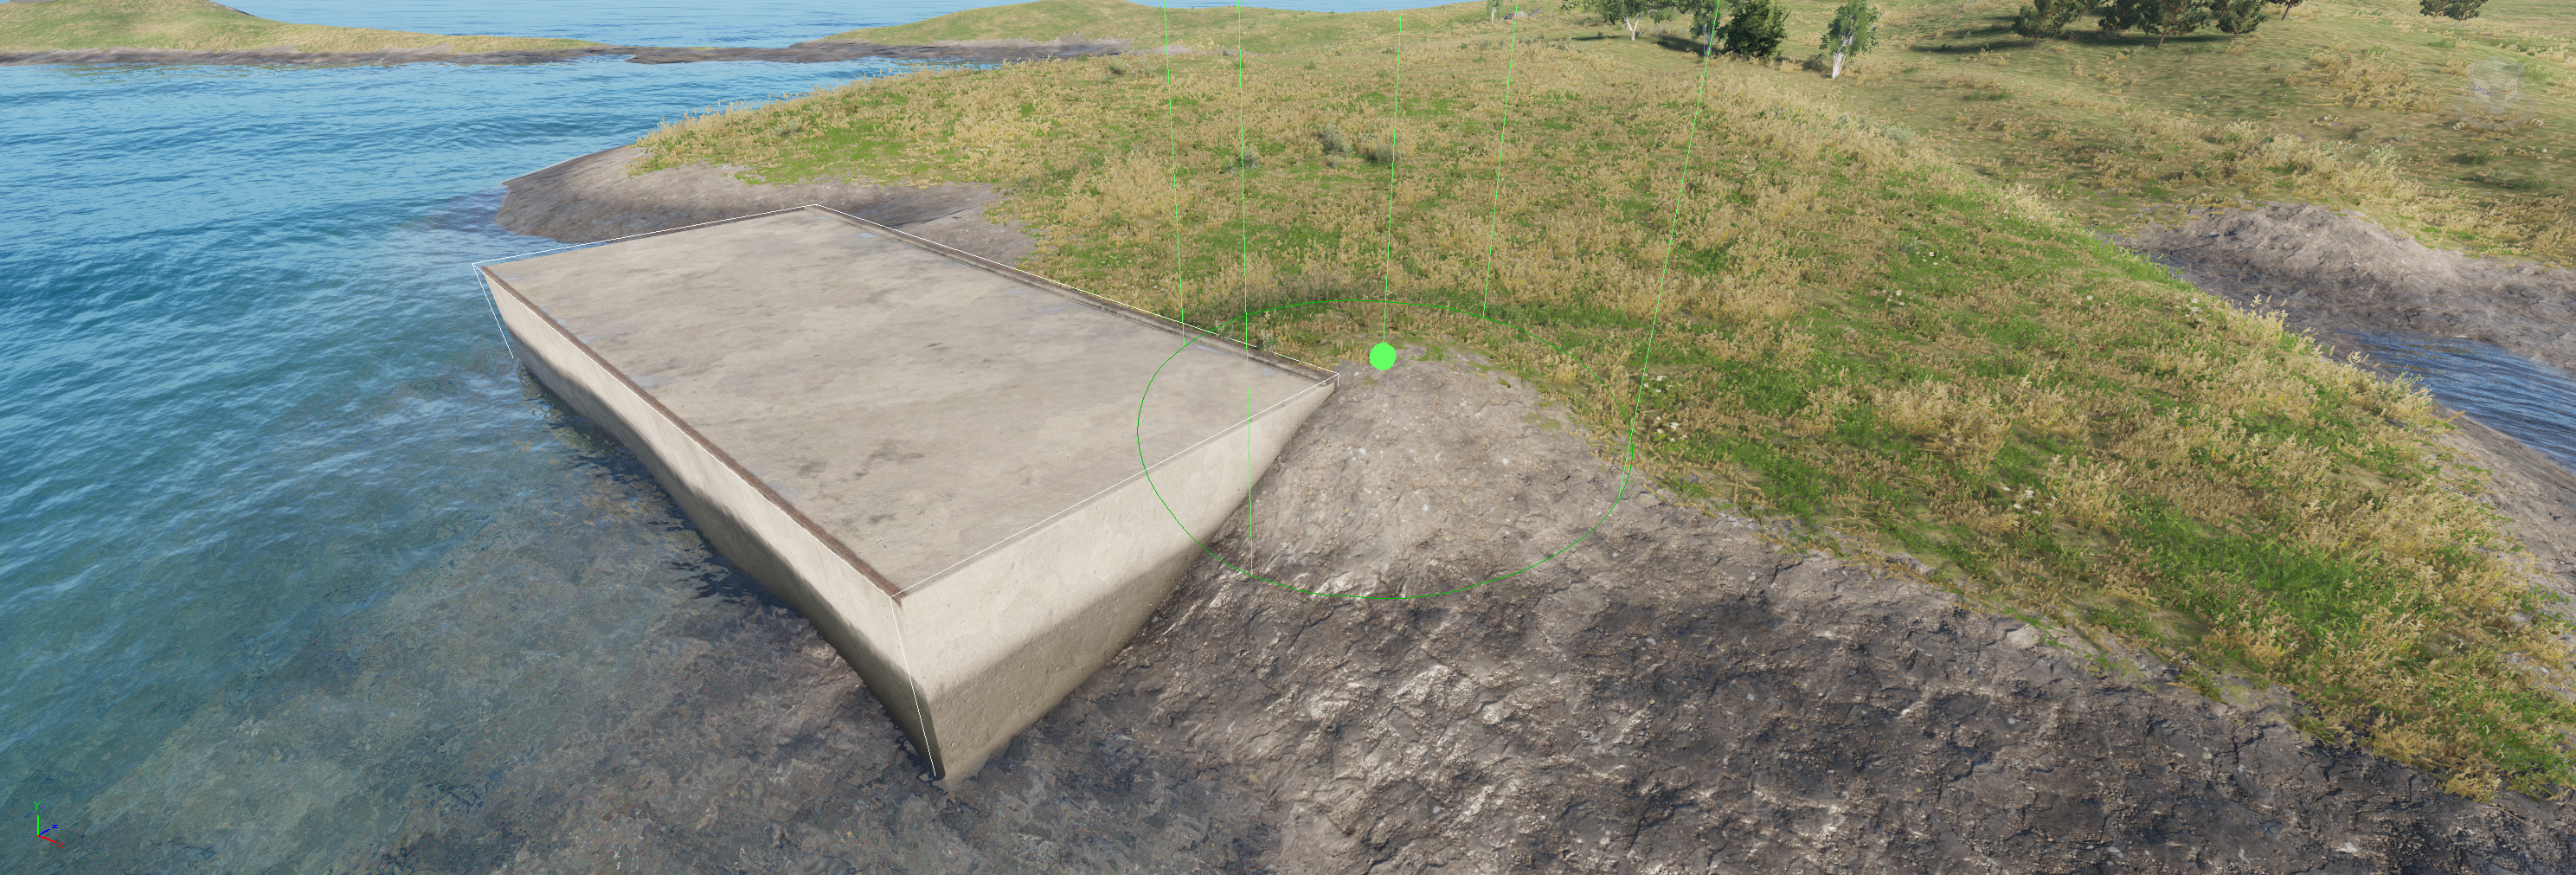
We'll use the naturally sheltering shape of the landscape to plan our small port. The docks and piers will follow the general shape of the cove, and then this will dictate how the buildings are placed around it. We start by leveling the terrain so that the piers can be connected to completely flat ground.

Simply raise the terrain with the sculpting tools, just on the corner of the pier object, then use the Flatten tool to repeat this height so that we can blend the objects we insert properly:
Select the Flatten tool, hit space when the cursor is at terrain with the wanted height, and you can now paint that height level where you need it. Play with the radius and falloff angles.
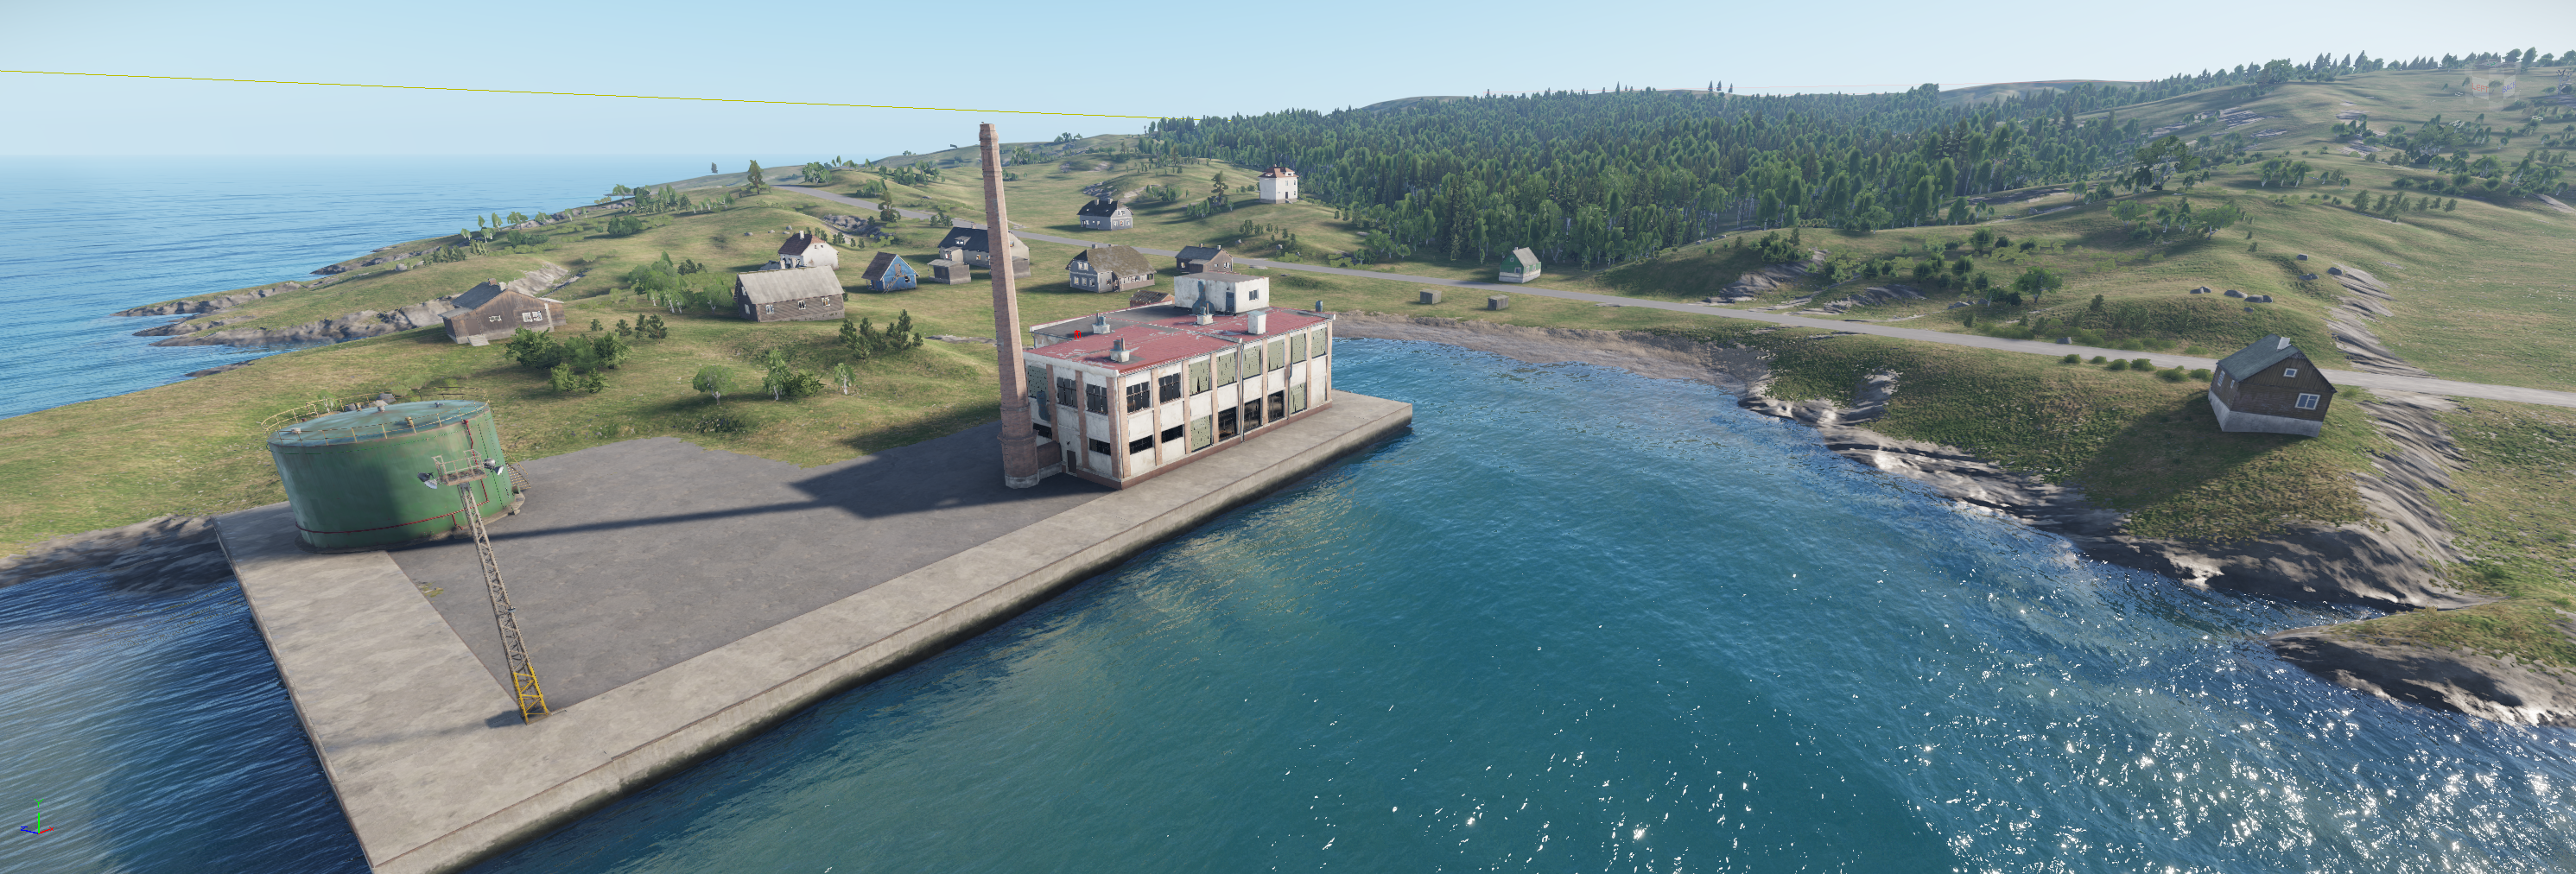
We can already see a small village and fish packing plant taking shape, and the area shows purpose.
Once we have the basic layout and number of houses placed, we add the surfaces we'll need in the future quickly with a brush.
Doing this is particularly helpful to people who use a terrain generator as part of their workflow, as this will help map specific-surface areas and avoid having to clean up blocks.
The idea here is to get the most important features in as quickly as possible, serving as a draft for future iterations.Now, we can move on to another area and bring it to the same level. We'll refine the area in later passes of our workflow.
« It's a long road, and we want to have the rewards in the form of visible results as often as possible. When we start roughly sketching out, we get a full picture developing early, and adding details can be done very efficiently. It can be very disheartening to work for many, many hours on a single spot, only to look at the rest of the terrain that hasn't even been started yet. Don't ask me how I know 😉 » — blud
This brings us to…
Road Network
Laying out the road network is our next step. Now we connect all the settlements, factories, farms, and villages we sketched out in the first step. It's not important to be accurate at this step. Simply lay things out so that you can, at the very least, drive on the roads. Intersections will be made nicely, and details will be added later. It's ok if you can drive on the roads, but they don't even need to connect at this point. Basic playability should be fine. You can also add temporary generators of sidewalks on them where needed to just have them there already. The sidewalks will need to be adjusted by hand later anyway, which saves you from placing them later.
Making the road network drivable from the get-go is good but don't go overboard with details yet. The goal is to simply place all the roads in working order on the whole terrain so we can playtest a little by going for a drive…
Forest Generators
Now is a good idea to place a bunch of nature generators on the whole terrain in the basic shapes you want for your forest and different biome. Sketch out your rough forest shapes and add generators to them. Keep in mind that these can be very expensive when covering a large area, and many clearings and open fields must be made. This is the part of our project where we must find the balance between performance and object count. It's not important to make these perfect at this time. The goal is to populate the terrain with the approximate object count it will have in the future. When we go into detail areas later, we'll refine each of them.
If you're painting over a satellite image you downloaded from somewhere, doing just very general outlines or exact shapes is up to you. Both can save you time in the long run, depending on your approach, but in the case of recreation of a real area, it's probably best to do it right from the beginning. It's very likely you'll have to make compromises since forests can be very performance-demanding.

This forest shows the optimal forest setup. The roads and power lines interrupt the trees dynamically if you turn on the option in the forest generator properties. The outer border of the forest is adjusted later when we refine the area on a detailed level.

We can select points on the vector and disable the forest generator parameters inside the vector tools. Each point has these flags, and they'll toggle the undergrowth on the edge of forests. In the previous example, these are both disabled inside the clearing to make it look clear-cut and recently lumbered. There hasn't been enough time for undergrowth and wilderness to reclaim the area.
« It's beneficial to have a lot of terrain height variation because you can use occluders (see below) very effectively. A very large flat area (Kilometers) covered in a forest won't run very well.
A flat landscape can have much, much worse performance with the exact same object placement as one with rolling hills and mountains using the same object count due to the terrain blocking the view of other objects, hence preventing their drawing.
Forests cresting the horizon or hills will be more demanding than bare hilltops and ridge lines. These are important optimizations the designer must consider.
It's good practice to have the wilderness between settlements be either in one collective layer or split into sections named after major natural features such as Forest_East, Mountains_West, Shorelines_NE, Coves_East, etc.
Generators are meant to cover a large area with vegetation, rock combinations, or anything you need to distribute semi-randomly on your terrain. It is, however, recommended to keep each generator a certain size because we'll want to adjust them later in the refining phase of this workflow, and too big shapes with generators can take many times longer to fill than many small ones. Besides, we won't want to use the same prefab all over and have a totally uniform forest everywhere, either, even if it's a large forest. A few hundred meters in each direction per shape is a good size to aim for in making a large forested area.
Plan ahead and experiment with these important things early. It will save you from the worst of the headaches you can encounter in making terrains! » — blud
Water Bodies
Lakes and ponds are super easy. Find a nice spot for a waterbody, draw a polyline around, drag a pond or lake prefab from the Prefab Library, and BAM – our lake is done!

Now we just need to spice it up a bit by adding the necessary flora that enjoys a wet environment. For the lakebed, we simply brush the shape with a big brush following the shoreline, using an appropriate ground surface, rock or sand, etc.
It's good practice to keep the polyline shape for the ponds entirely flat. If it's very uneven, unforeseen things can happen. If your pond looks weird, try reversing the polyline, it's possible that your lake is facing upside down.
« You can easily make a dam if you want! Just draw a spline spanning a gap in a valley and use a wide offset on the "affect terrain" part of the road generator. At least as wide as the dam will be deep. Put a lake behind it, and you have a dam! » — blud
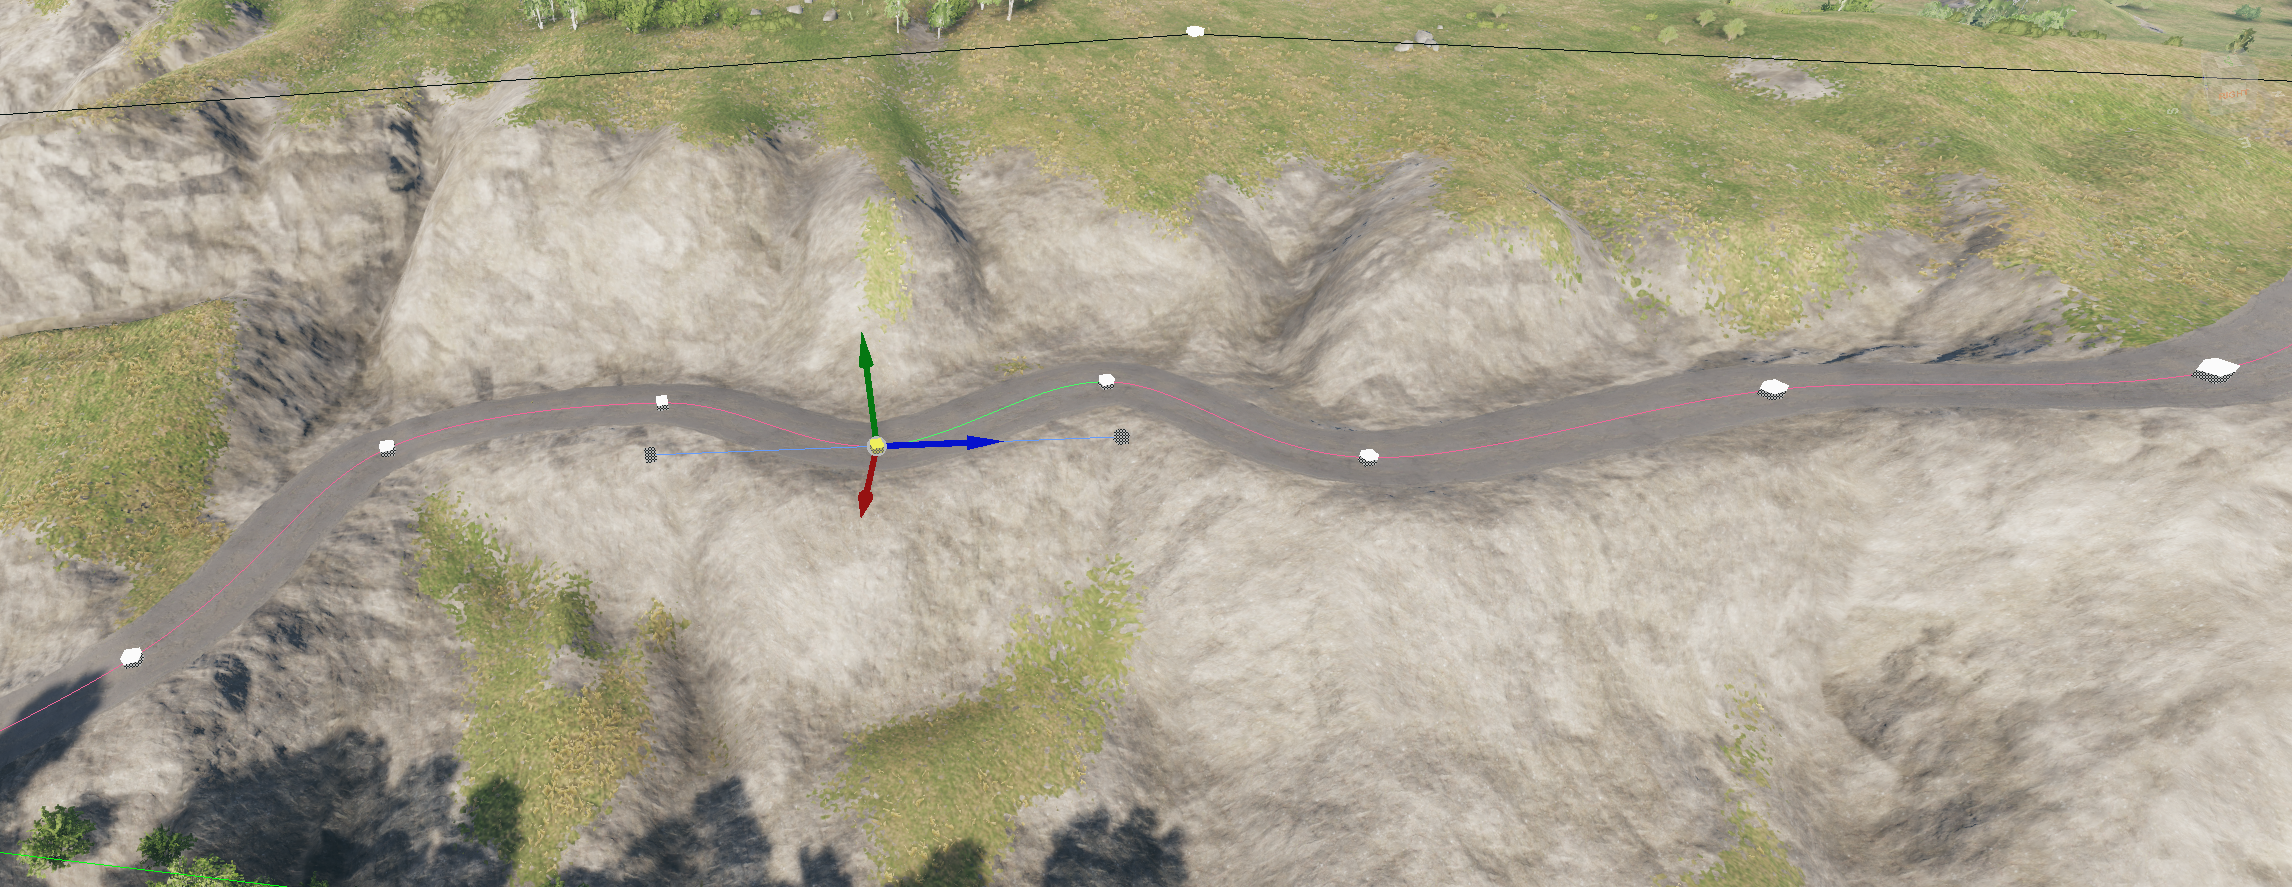
Rivers
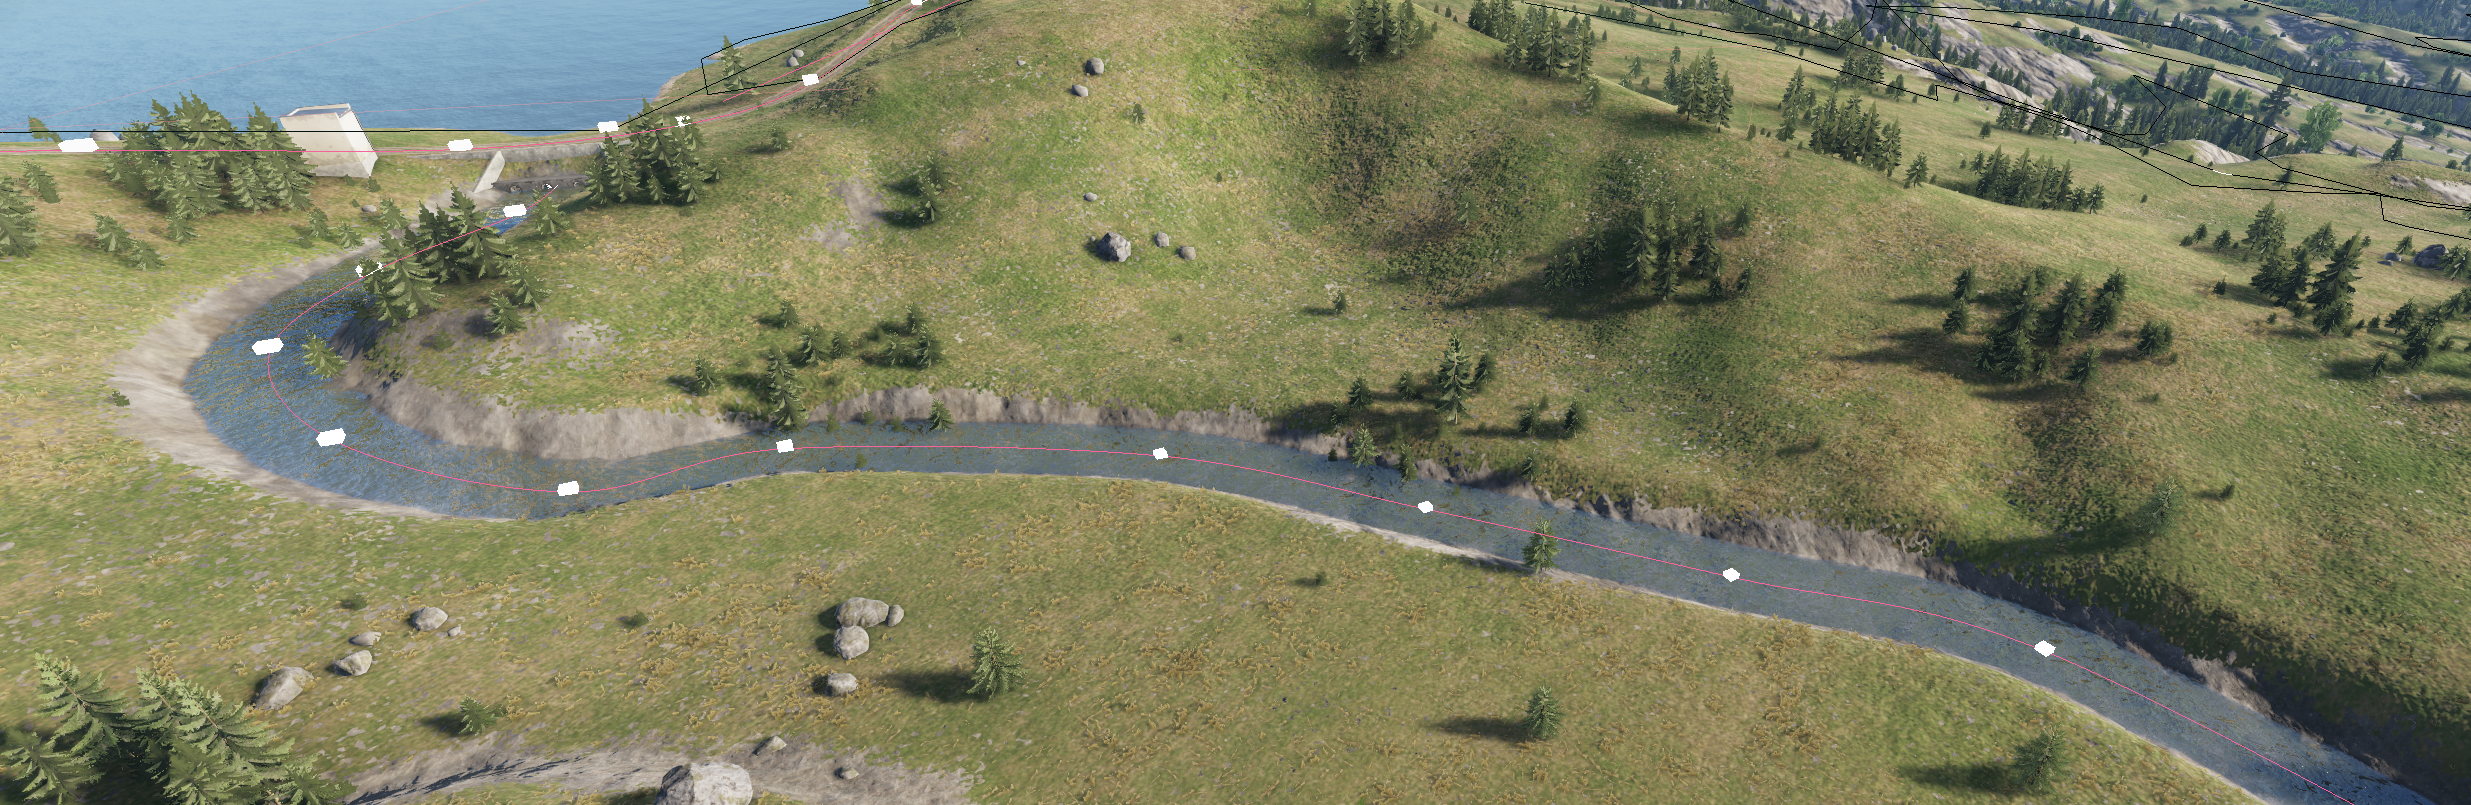
It's pretty simple to make rivers. Start with the vector tool, make sure snap to terrain is turned on, and place a spline where and how you want your river. Make sure to add enough points that you can make it snake along the low ground of the terrain nicely.
Next, add a road generator to it, preferably the dirt one from Prefab Library. Make sure it has the Affect Height Map checkbox ticked in the road generator properties. Now we'll use this road to deform the terrain and make a nice riverbed.
In the vector tool, turn off snap to terrain and click select all. It will now have selected all the nodes in your vector, and all we have to do is move the whole thing down in the terrain half a meter to a meter, depending on how wide and deep we want our river.
Experiment with the falloff in the road properties to make a profile you like. Whether you want steep or easily fordable river banks.
Now go into Prefab Library and pick a river prefab, and drag it onto your spline in the hierarchy. Does the river flow upwards? You can reverse it in the river generator properties.
Now simply select a round brush and the surface you want in your riverbed and paint along the spline with a brush slightly wider than the river - you're done!
When the river shape is entirely done, select the road object, go into the Terrain tool, and bake the road to the height map.
Now the road can be deleted. If done properly, the terrain that was deformed by the road generator is now still deformed, and our basic river is complete.
We'll make it look nice in later stages when we've already put down all of our basic rivers where we want them.
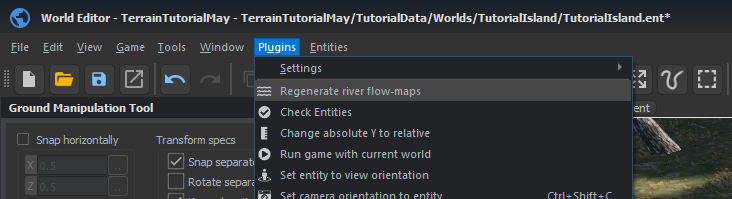
When you place rivers, you can use the function in the picture above to regenerate the terrain flow maps, which will alter the way the water flows. More on this later when we start detailing our terrain.
There are many parameters to modify how the river works. Notice the object properties when you have the spline and child object generators selected, respectively.
Since a river normally flows from a water body or simply comes out of the ground as a tiny stream, we can recreate both of these by camouflaging the river with object placement.In our example terrain, we made a dam and used culvert objects from which the river can start.
Powerlines
Creating Power lines is a very good next step.
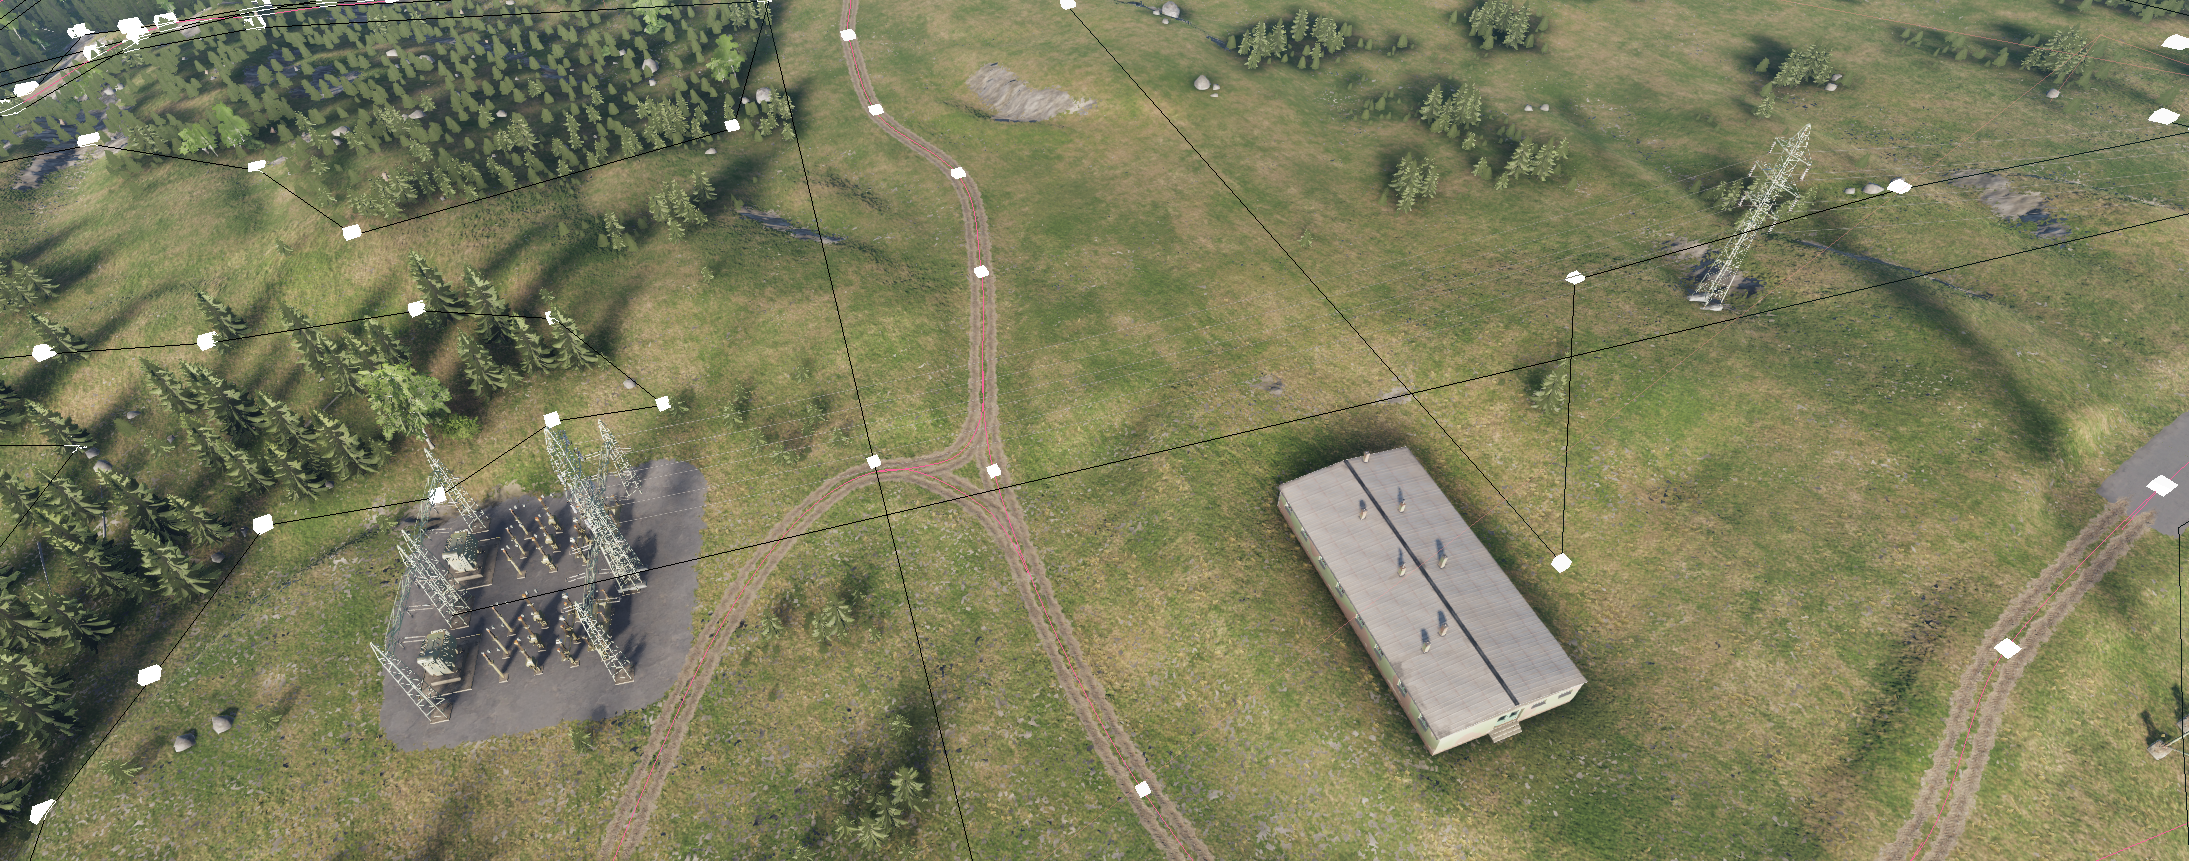
Lay out your power grid loosely between every area that needs power. There are different types for different usage. A farm will, for example, not have high-voltage lines connected to it, but it's very likely to have high-voltage pylons in the farmer's fields just to annoy him when he plows.

When placing power lines, we want them to span gaps in the terrain, if possible, from peak to peak. We can set the generator to place a pole exactly where we need it!
With the Vector Tool activated, select a point and enable "Generate Per Point." It should now put a pole exactly on the point.
This is also how to make angles where the power lines need to divert because something is in the way. Roads and intersections, structures that were there before the power lines were laid out, and similar.
If your power line crosses a road and you get a power pole on it, simply add a point next to the road and do it like above. The generator should then figure out how to make space itself.
It's not important to put them in very neatly at this point. Just put them in between settlements generally where they'll be needed. We'll tidy up the ends later and adjust the middle sections as we work near those when we do the final detailing of our terrain.
The idea here is to quickly put the assets and generators in the world. If you need to run power lines through the forest, no biggie, just turn on the avoid power lines flag on said forest generator, and it will make room for the powerline after regeneration.
See the following pages for more information:
- https://community.bistudio.com/wiki/Arma_Reforger:World_Editor:_Powerline_Generator
- https://community.bistudio.com/wiki/Arma_Reforger:World_Editor:_Powerline_Generator_Tutorial
Now backup your project if it isn't done already!
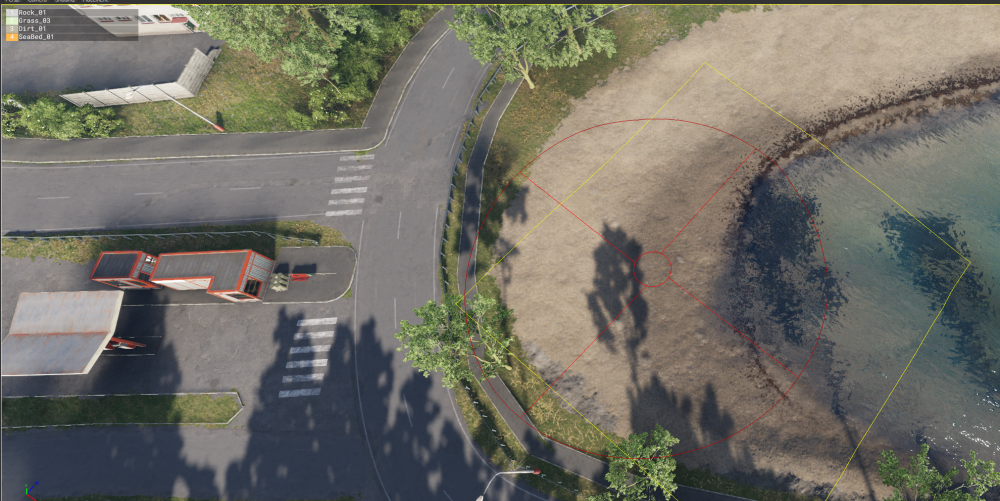
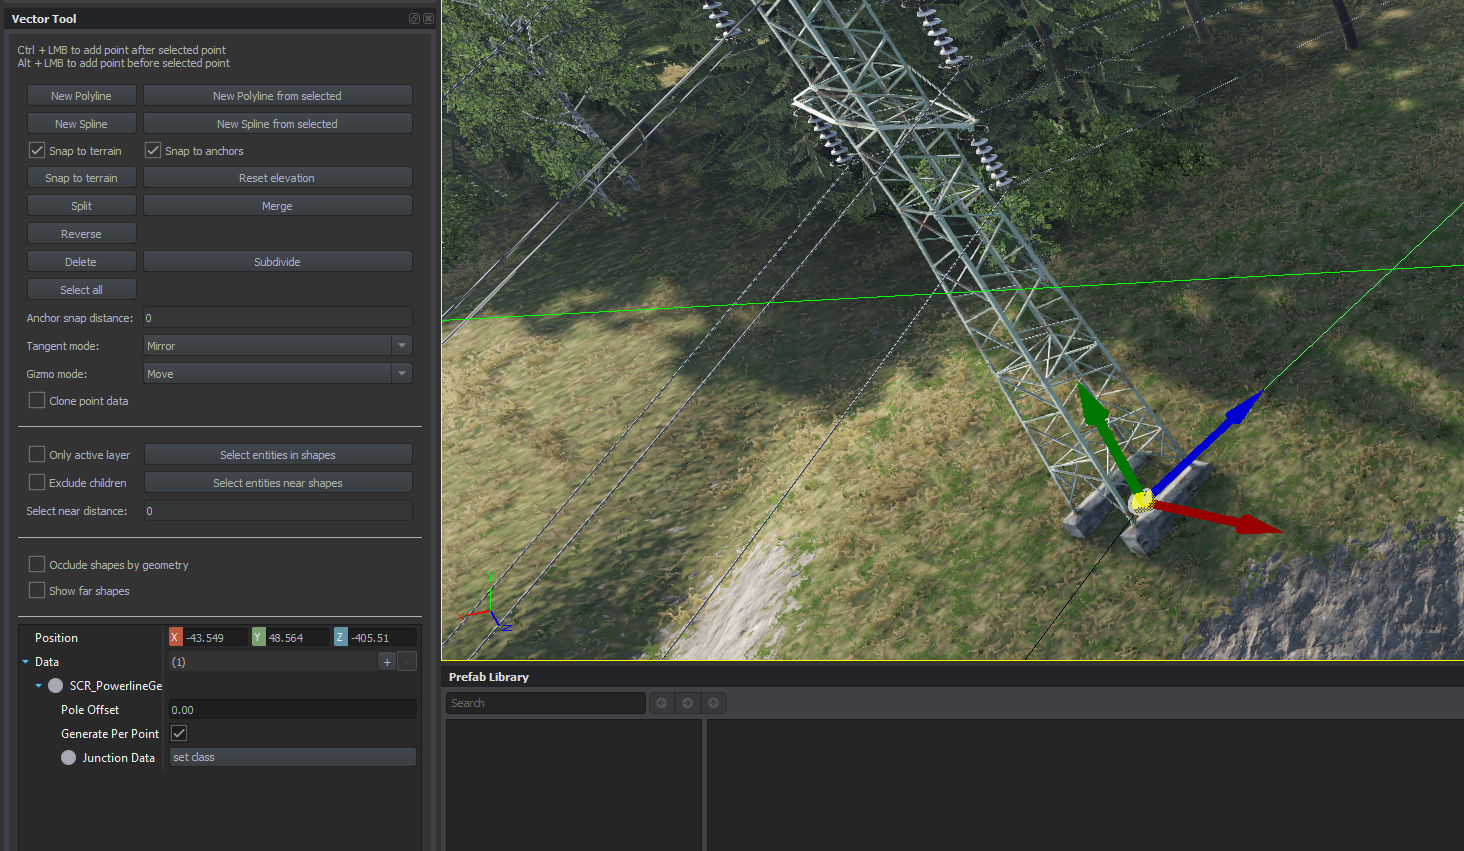
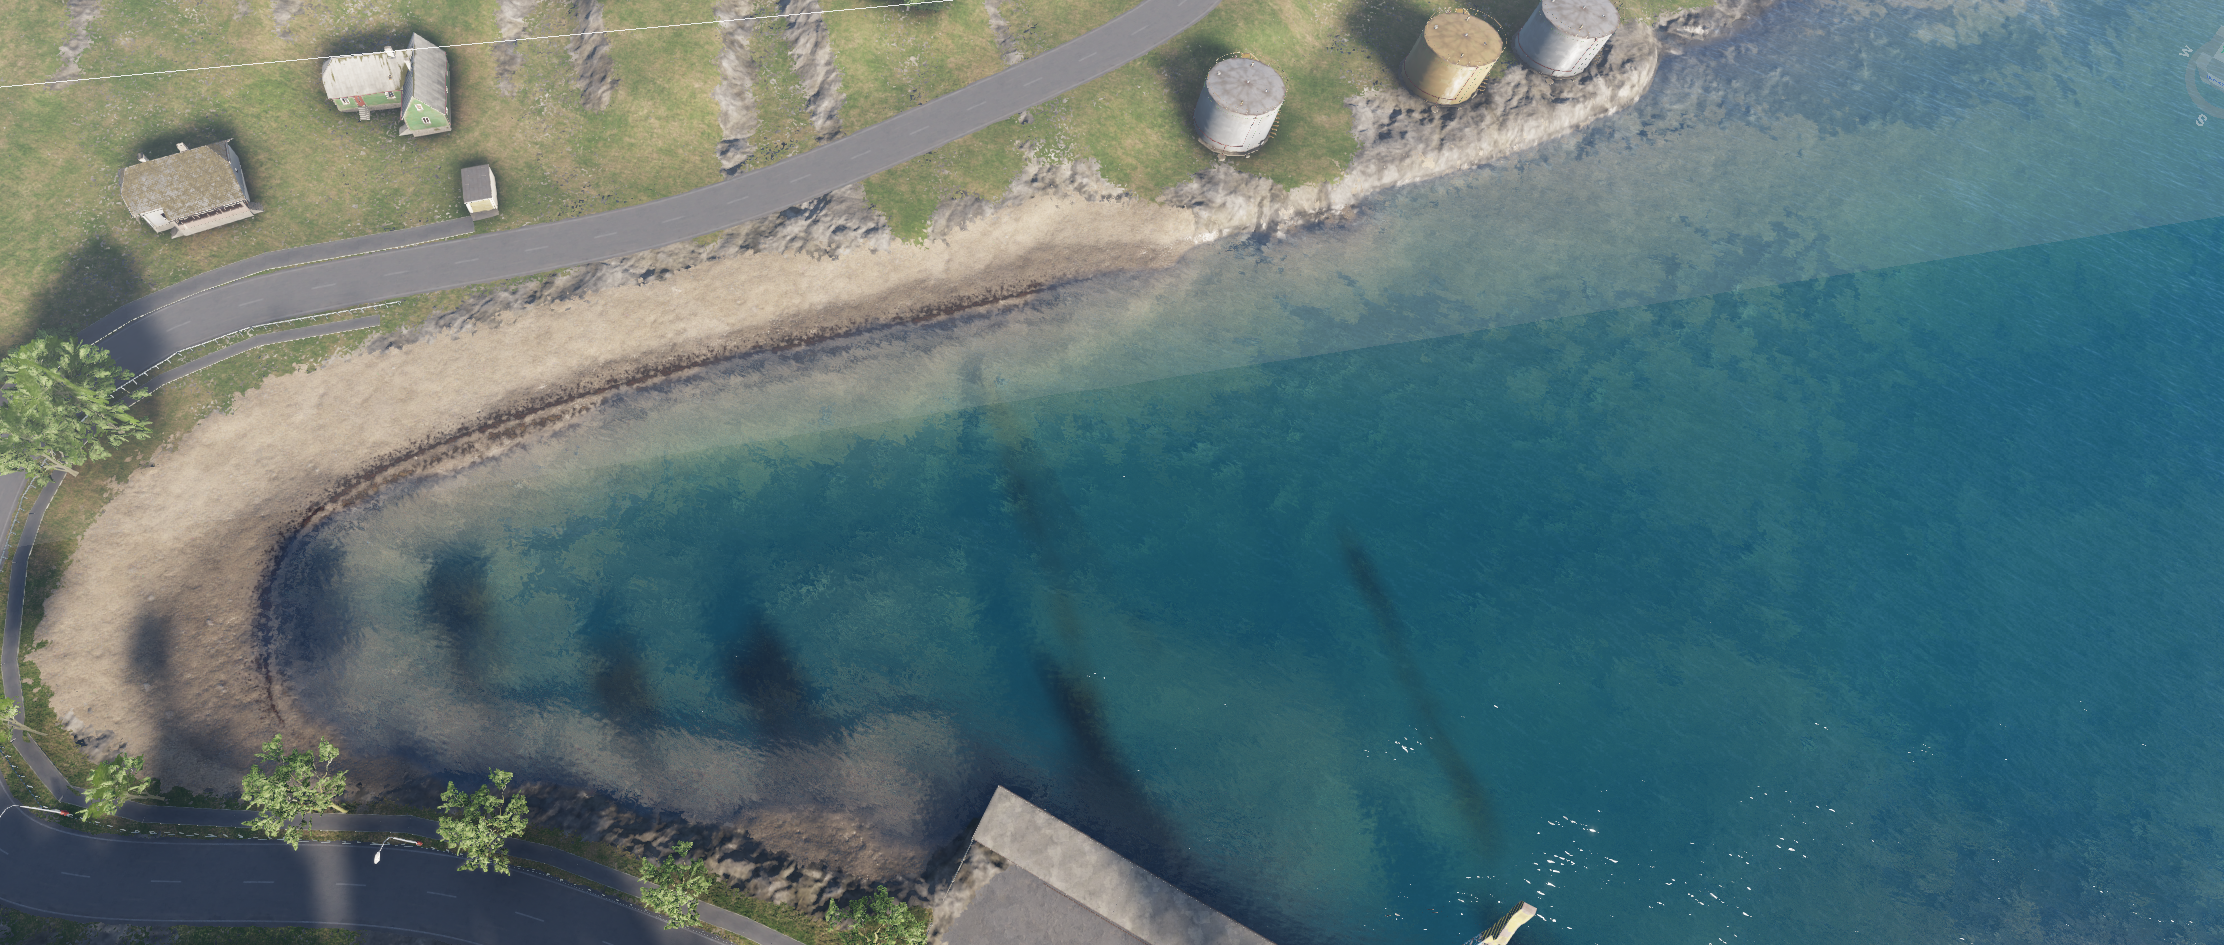
Shorelines
These are so varied and involved that writing a single segment about them will increase this document by many pages. Most elevation data to be found on the internet won't have bathymetry (underwater landscape), and it's mostly necessary to make this ourselves.

On our sample terrain, the beach was quickly sculpted by lowering the terrain in the bay and using a smooth brush. When sculpting terrain, work large first. Use the Flatten tool to get the basic depth, and then use smoothing and different brushes to create some variation. You can also use a big brush, flatten the rough max depth area of your bays and coves and general coastline in one pass, and then work over it with the smoothing brush in a second or third pass.
Then, add details as you work on object placement in each area when refining your areas in detail later.
It can be very hard to make the underwater and shorelines look good. We've provided an underwater set of our rocks to help us make the difference better on the shoreline. It's recommended to make your own generators with how to place things underwater if you need them. There are also decals to be used on splines with road generators to crate beach debris.
The seabed surface mask is quickly painted with some random brushes. It can be generated with simulations in external editors too.
Creating underwater landscape and terrain mesh/height data should be done at a source file level, and third-party software solutions will be needed.
Occluders
Once your whole terrain is sketched out with the above basics, you'll have an idea of performance implications already; this is where Occluders can be very helpful to place at this stage.

What are occluders? Simply an invisible object with a given size where the engine knows that if one is placed, the player cannot see what is happening behind it. All of those objects behind are not being rendered, saving performance.
Occluders are one of the coolest new tools for terrain makers in Enfusion compared to Arma 3 – but note that if they're not sufficient to curb performance issues on your terrain, the only remaining option at this point is to reduce the object coverage.
The engine does a good job of creating auto-generated occluders in the terrain, but sometimes we can improve this by placing big ones if we have features that can benefit from it.
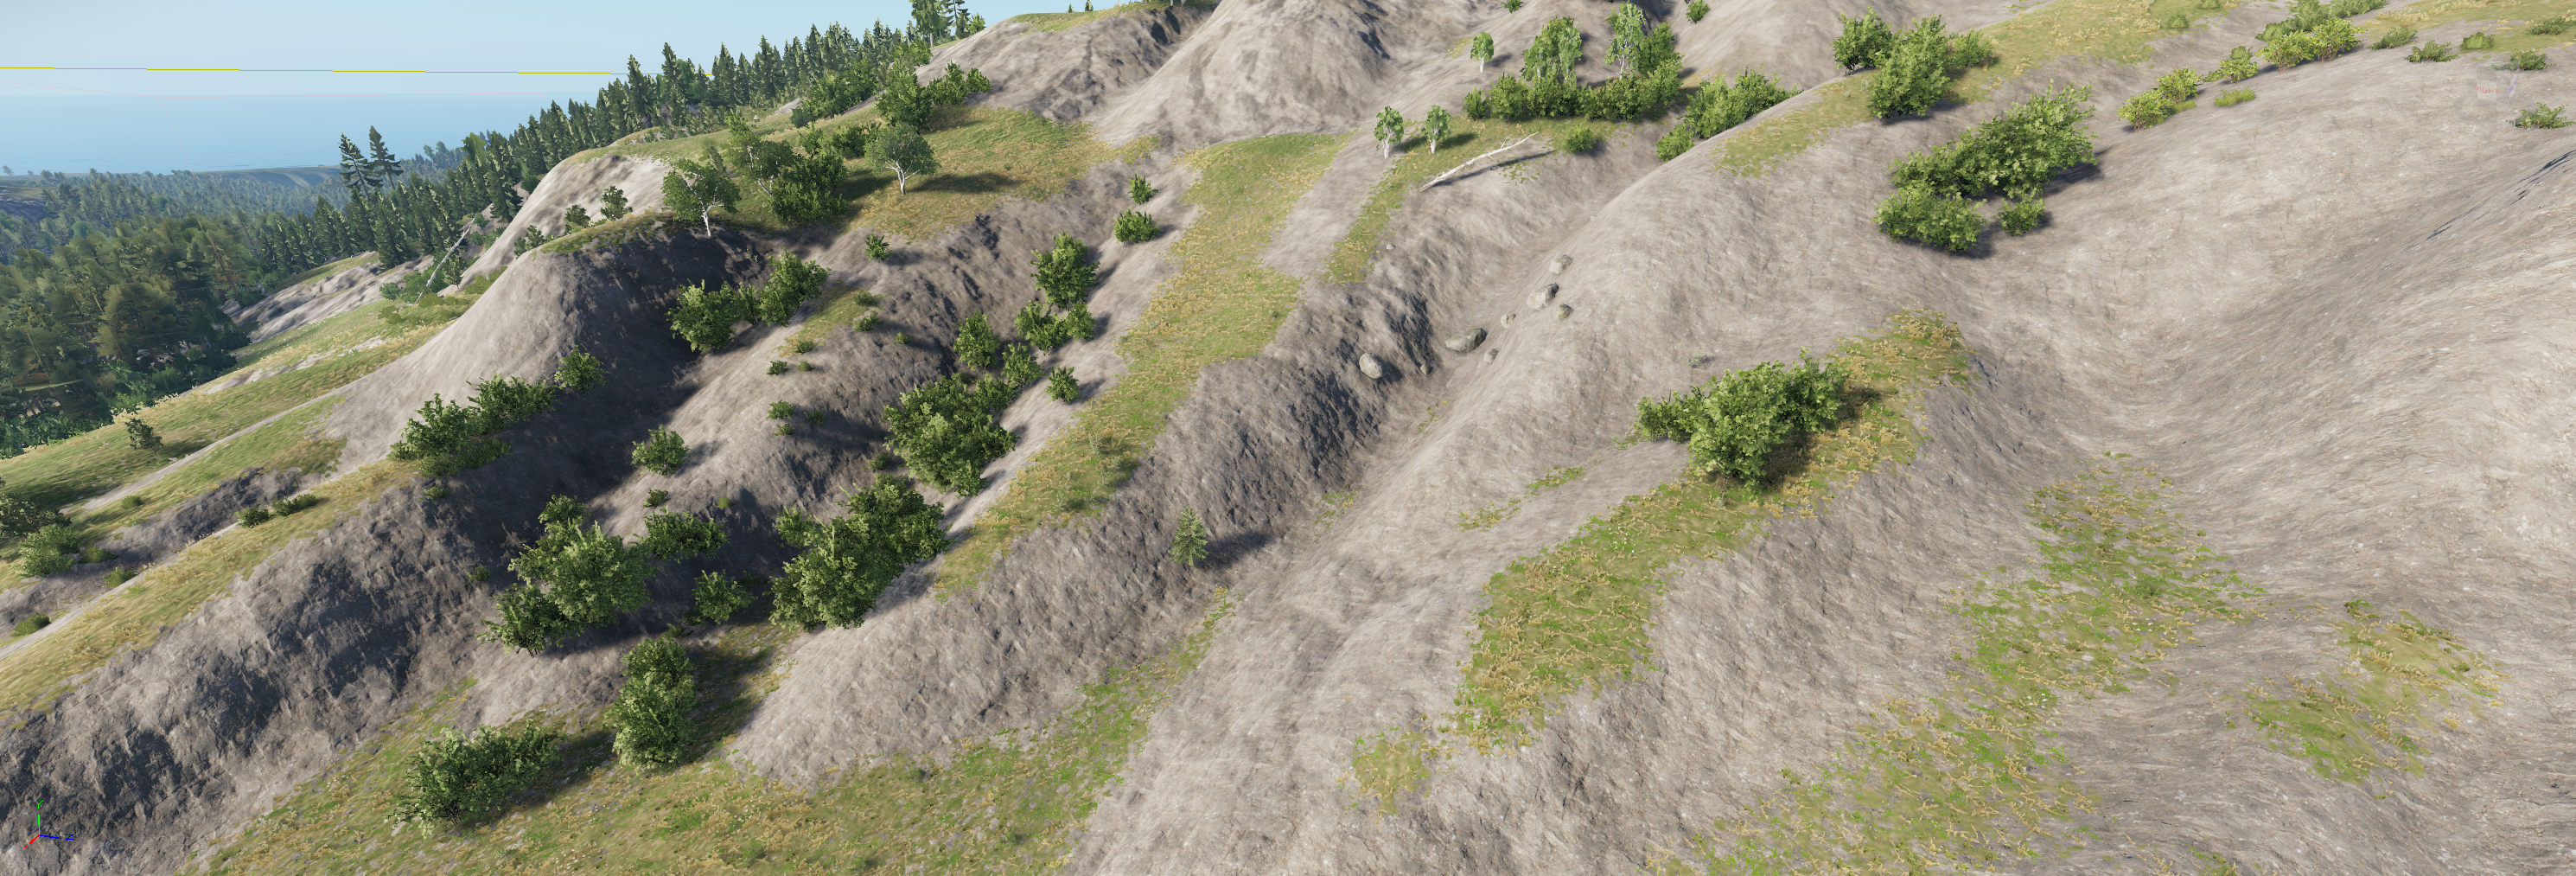
A good trick can be to not have woodlands on crests and then put occluders inside the terrain, all depending on your topography. In our example terrain, occluders are placed in the ridgelines that are suitable for them.
You add an occluder like this:
Find the WorldOccluderEntity in Resource Browser and drag it to your viewport.
Use the Bounding Volume Tool to adjust it. You simply click and drag one of the red, blue, or green planes back and forth.
Make sure that the occluder entity doesn't stick out of the ground anywhere, as it can then have unforeseen consequences later – you might want to try walking inside one and see how it works…
Added a few of them in locations similar to the above? You can measure FPS with and without them on your terrain and see for yourself if it makes a difference.
Remember to keep all your occluder objects in a layer named occluders or similar and nothing else in there.
Again, backup your project now.
Final Details
(Beta stage, maybe?)
In this phase, we'll detail all our areas. Now we finally move the houses we placed earlier to where they should be. Line them up into nice streets and add the sidewalks and streetlights etc. Now we paint all the details that go with our properties and areas. Add lawn grass, driveways, etc., by painting them. Now is the time to place all of the sheds and flowerbeds in gardens. Make your special zones with your crazy ideas. Add military bases and all the fun stuff. This is the part of the project where we go into super close detail. Also, in this stage, it's good to work big picture first. Try to make every settlement or site consistent in detail. Example: Do gardens in one village, then do all the gardens in the next one until all gardens are pretty equal across the terrain.
We recommend planning your project and splitting it into some sort of milestone-based loop where you repeat this stage until your terrain is uniformly complete. It's a nice goal to work towards having consistent levels of detail as well as playability over the whole terrain. Particularly when making terrains for the community, where players have access to the terrain during development.
« Internally, at Bohemia Interactive, each major area with a person responsible for it will have a separate concept-alpha-beta stage where the playability is analyzed and improved in different passes where the area gets work. We refer to this as refining, detailing, or refinements. Near completion, each area gets a form of data lock where only bug fixes are allowed to be made while work on the remaining areas is being completed. Features are no longer added, and ones that won't be finished in time are cut. You never want to end up with some places super detailed and some places nearly empty if it's avoidable. For a community project where the terrain is being developed and publicly playable at the same time, it's good to consider this whole segment of the tutorial as a loop you repeat for every public iteration of the terrain. Exceptions would naturally be areas where players would stage for missions etc. Areas that are unique to the terrain, such as airports or strategic areas. You'll want these playable early, but don't go overboard. This is the way. » — blud
Roads
Road details are done as soon as we have them where we want them to be on our whole terrain. We now pull together the vertices to make nice intersections etc. If you have trouble making the intersections work properly with heightmap integration, try adjusting the vertexes in your splines. There are many decal prefabs that are useful for making your roads look cool and getting rid of things like stripes and such. You can apply generators to add things like verge posts and street lights.
When placing roads, it's important not to use too many points. If you want to make a nice S curve or something, it's better to adjust the vectors properly or add a point where we need it later when we start detailing.
Remember to have "Snap to Terrain" turned on in the Vector tool when placing the roads (unless, as said before, you want the road to adjust the terrain under it).
It's best to make your roads using relatively evenly spaced vertices, even if they don't turn much. This is important if we want roads that follow the terrain more than cut into it. Sometimes we'll want roads that are lowered between hedgerows.
Remember that when you use the terrain integration feature, the road follows the spline and NOT the terrain shape.

After you have your roads placed as perfectly as you want them, re-import your satellite map, and they'll be rendered at a distance without clutter on them.
Intersections can be tricky. The important thing to pay attention to is that all the roads join approximately at a single point and that they're all at the same height.
Making sure to flatten the terrain so that it's completely level where you want the intersection. It's much easier this way to make it where the landscape isn't totally flat.

We'll add decals and make the intersections even nicer and more detailed. Don't go overboard. Try to use them to cover up blemishes and make it look like in the real world where repairs have happened. Phone cables were buried, potholes were fixed, and maybe some cracks.
Add manholes and patches, speed signs, crosswalks, etc.
Remember to re-import your sat map every time you do some major roadworks so that the roads are added to the distance, and the clutter gets occluded!
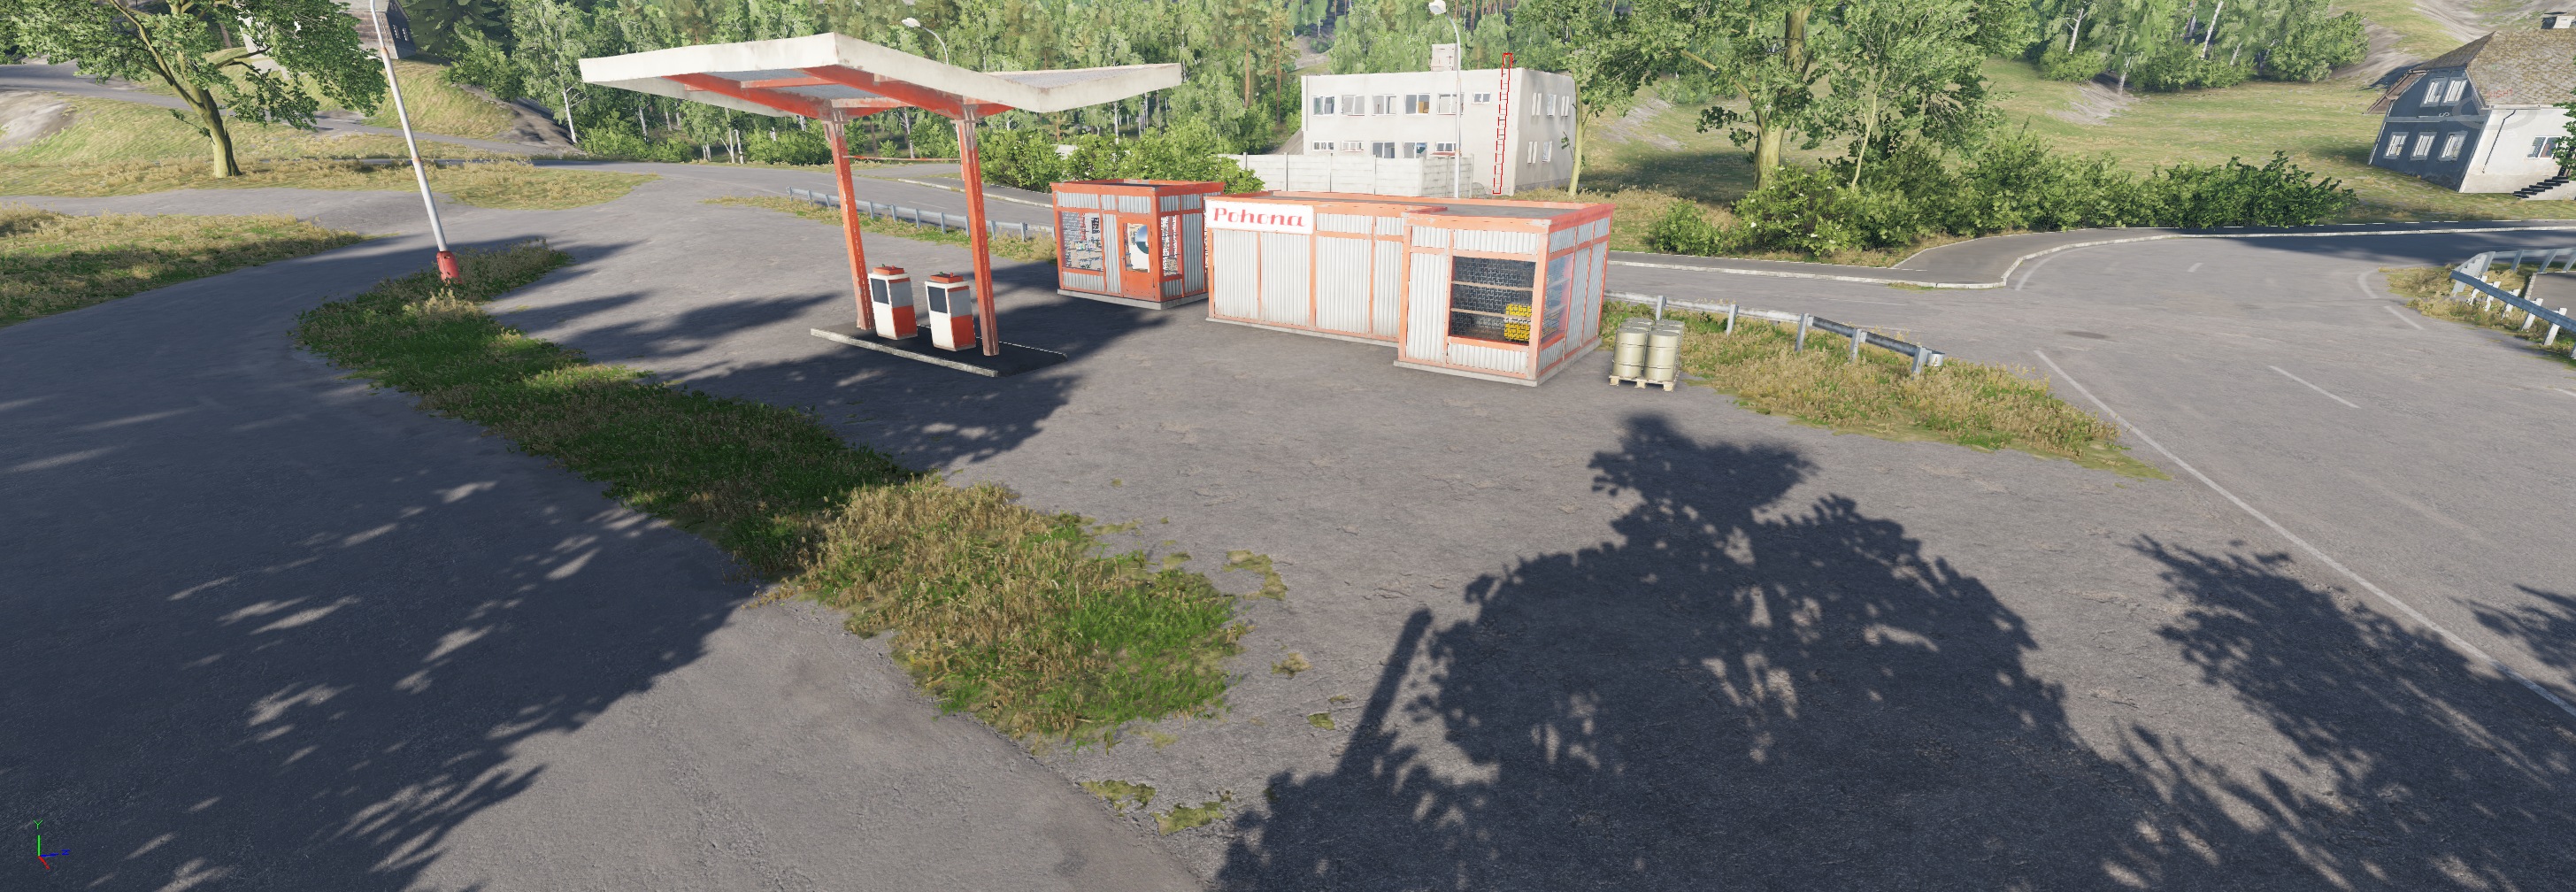
The basic fuel station was positioned earlier. Now we line up everything and add the small details we need to make it look used.

Now we add all the small details on a consistent level in each settlement: sidewalks, crosswalks, benches, all the small things. Add street lights at an interval that suits you. Make sure to set the time to night every now and then to see how the lighting looks when it's dark!
It's highly advised to paint all surfaces at the same time as you adjust your houses to final positions and place fences and sidewalks and such. Line things up nicely.
Road signs, rubbish bins, benches, junctioning power lines, and roads. Fences, crash barriers. All of those things should be put in at this stage, and our terrain should be looking pretty awesome by now.
Rivers
The rivers use flow maps of the terrain shape and river depth to make the current flow.
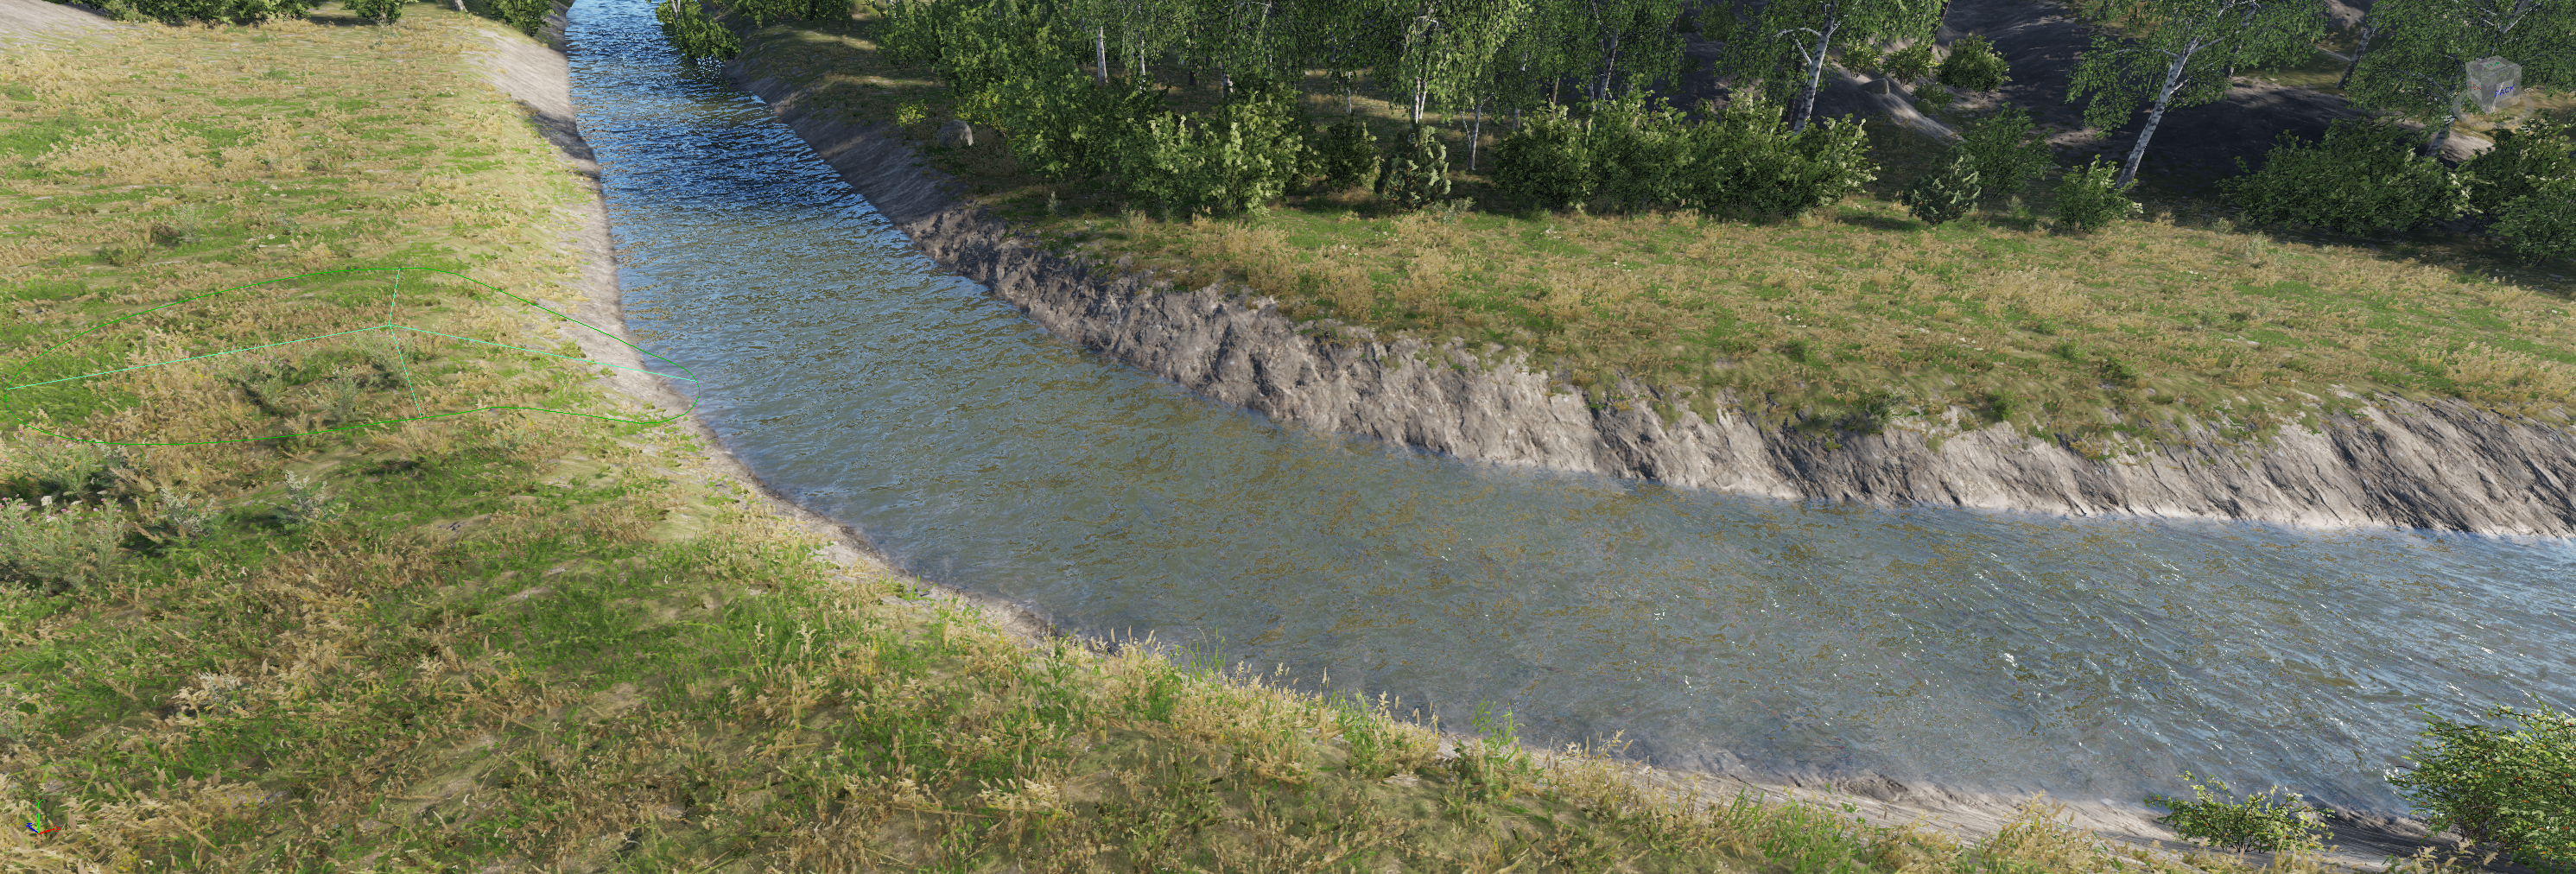
This river bend looks rather boring and artificial. There are many things we can do to spice it up. One of the coolest is to make variations in the depth and width of the river itself.
As always, the big picture first: let's start by making some shallows in the terrain mesh, and then we'll move on to adding objects afterward.
Make sure your river has been baked to the height map and you can now manually sculpt the terrain in the riverbed. Add some surface variation in the river where you want the differences. This is easily done by using the surface paint tool with a small brush with a soft setting. This is where artistry comes in. Get creative!

When you have something decent to start detailing, you can regenerate the flow maps and see how the river now reacts to your ground changes.
You can liven the scene up a whole lot just by adding a few rock objects in and around the river.
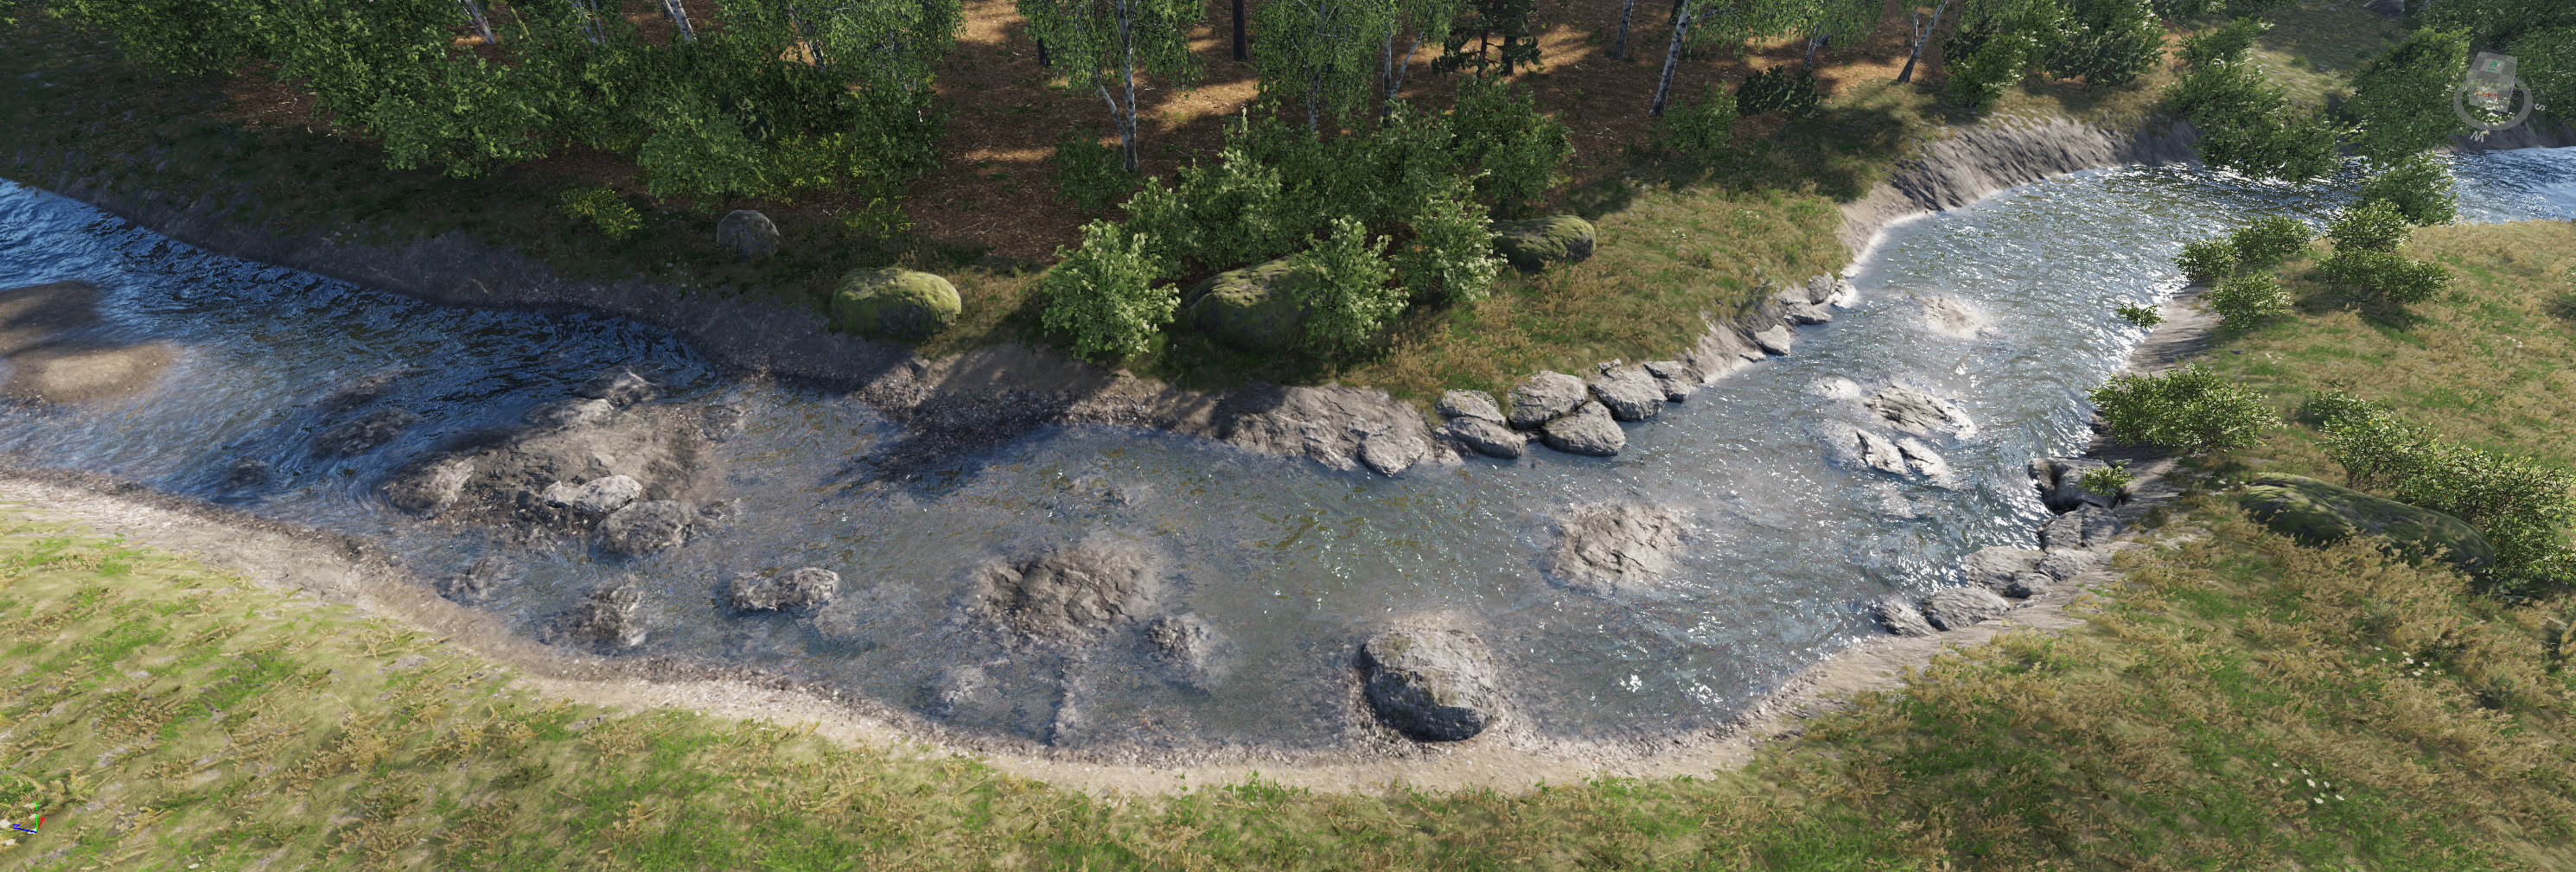
The small scene is done. Notice how the stream appears to flow around the objects, and the rocks look wet. Objects in the water will also affect the flow!
It's good practice to keep the manually placed objects to a minimum and use generators for the detail on the shore. You can finish this section of the river on our sample terrain.
Light Probes
Using light probes and probe volumes, we can create dark areas inside our terrain if we need to. We can, this way, make caves or hidden areas that don't get direct sunlight, and everything inside it is also dark.
This area looks suitable for a small cave. We start by flattening the terrain inwards into the landscape.

Cover the hole with some rock objects to hide the floor with some rock objects.

Find the env probe like above and drag it inside your new cave.
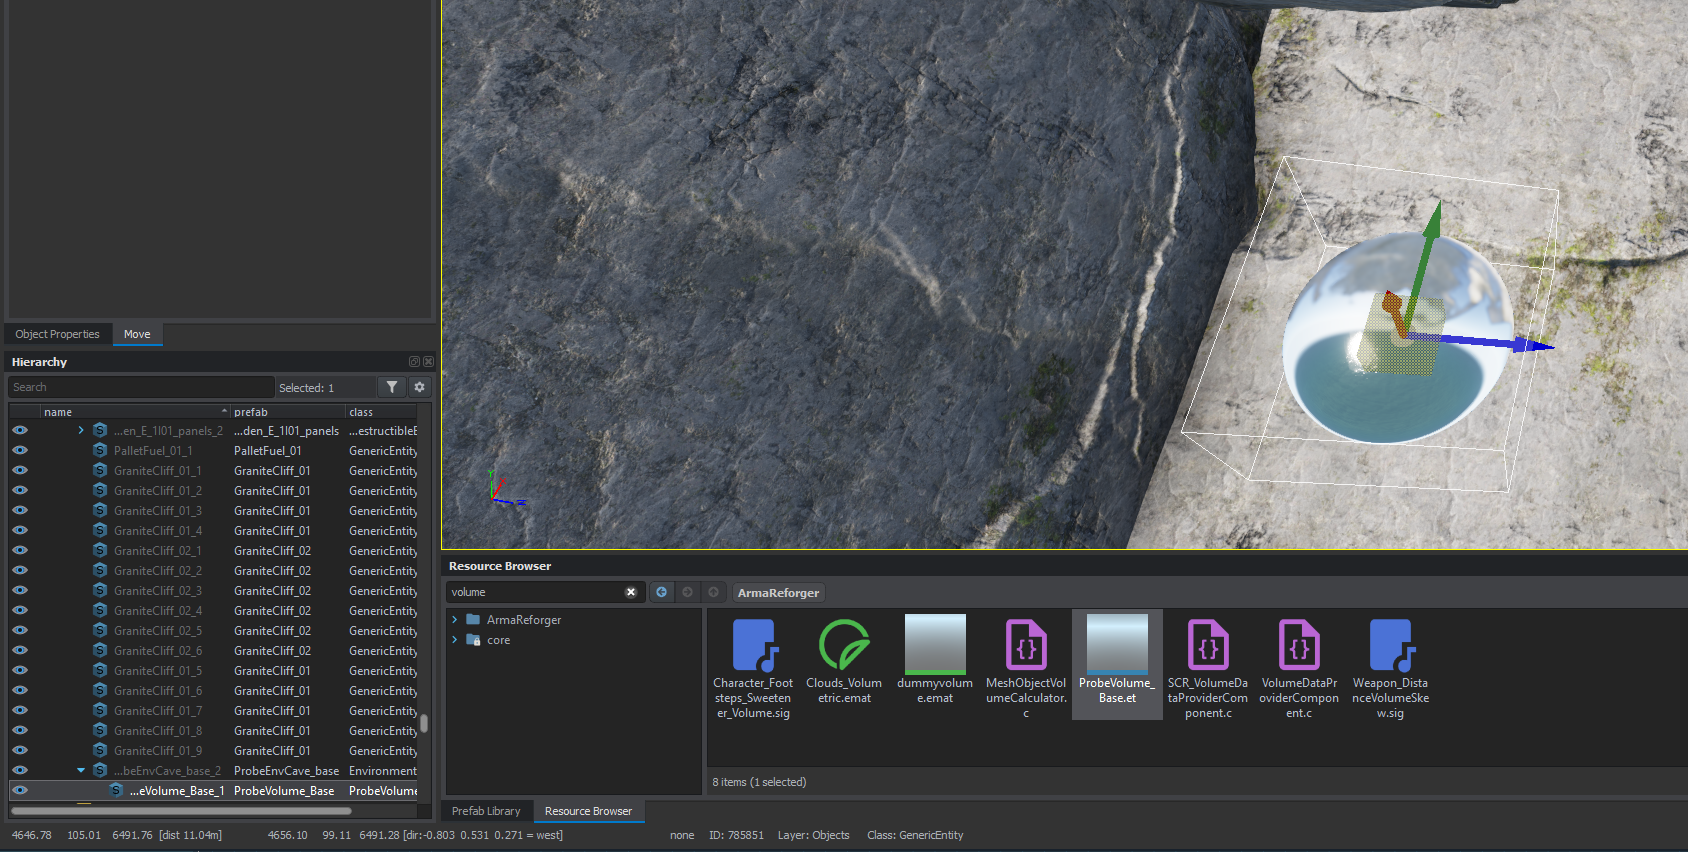
Find the ProbeVolume_Base prefab and drag it onto the env probe you placed previously so that it becomes a child object of it.
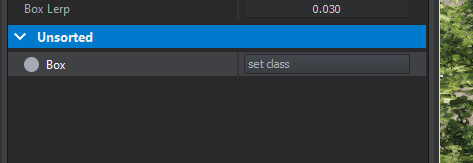
In the ProbeVolume's Object Properties, click set class, and we can begin modifying the shape.

Now use the Bounding Volume Tool to adjust the volume to cover the inside of the cave where the player should see darkness.

Be careful that the volume doesn't clip through your rock placement.
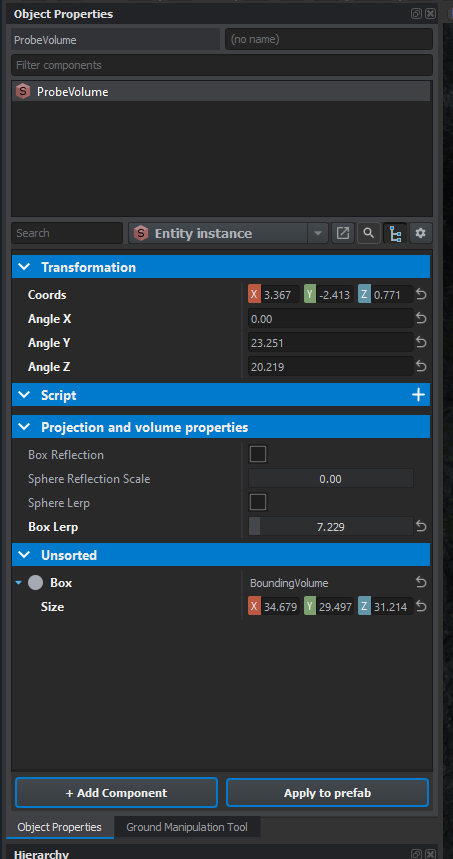
You can modify the Box Lerp setting on the probe volume properties to make a smoother transition to darkness.
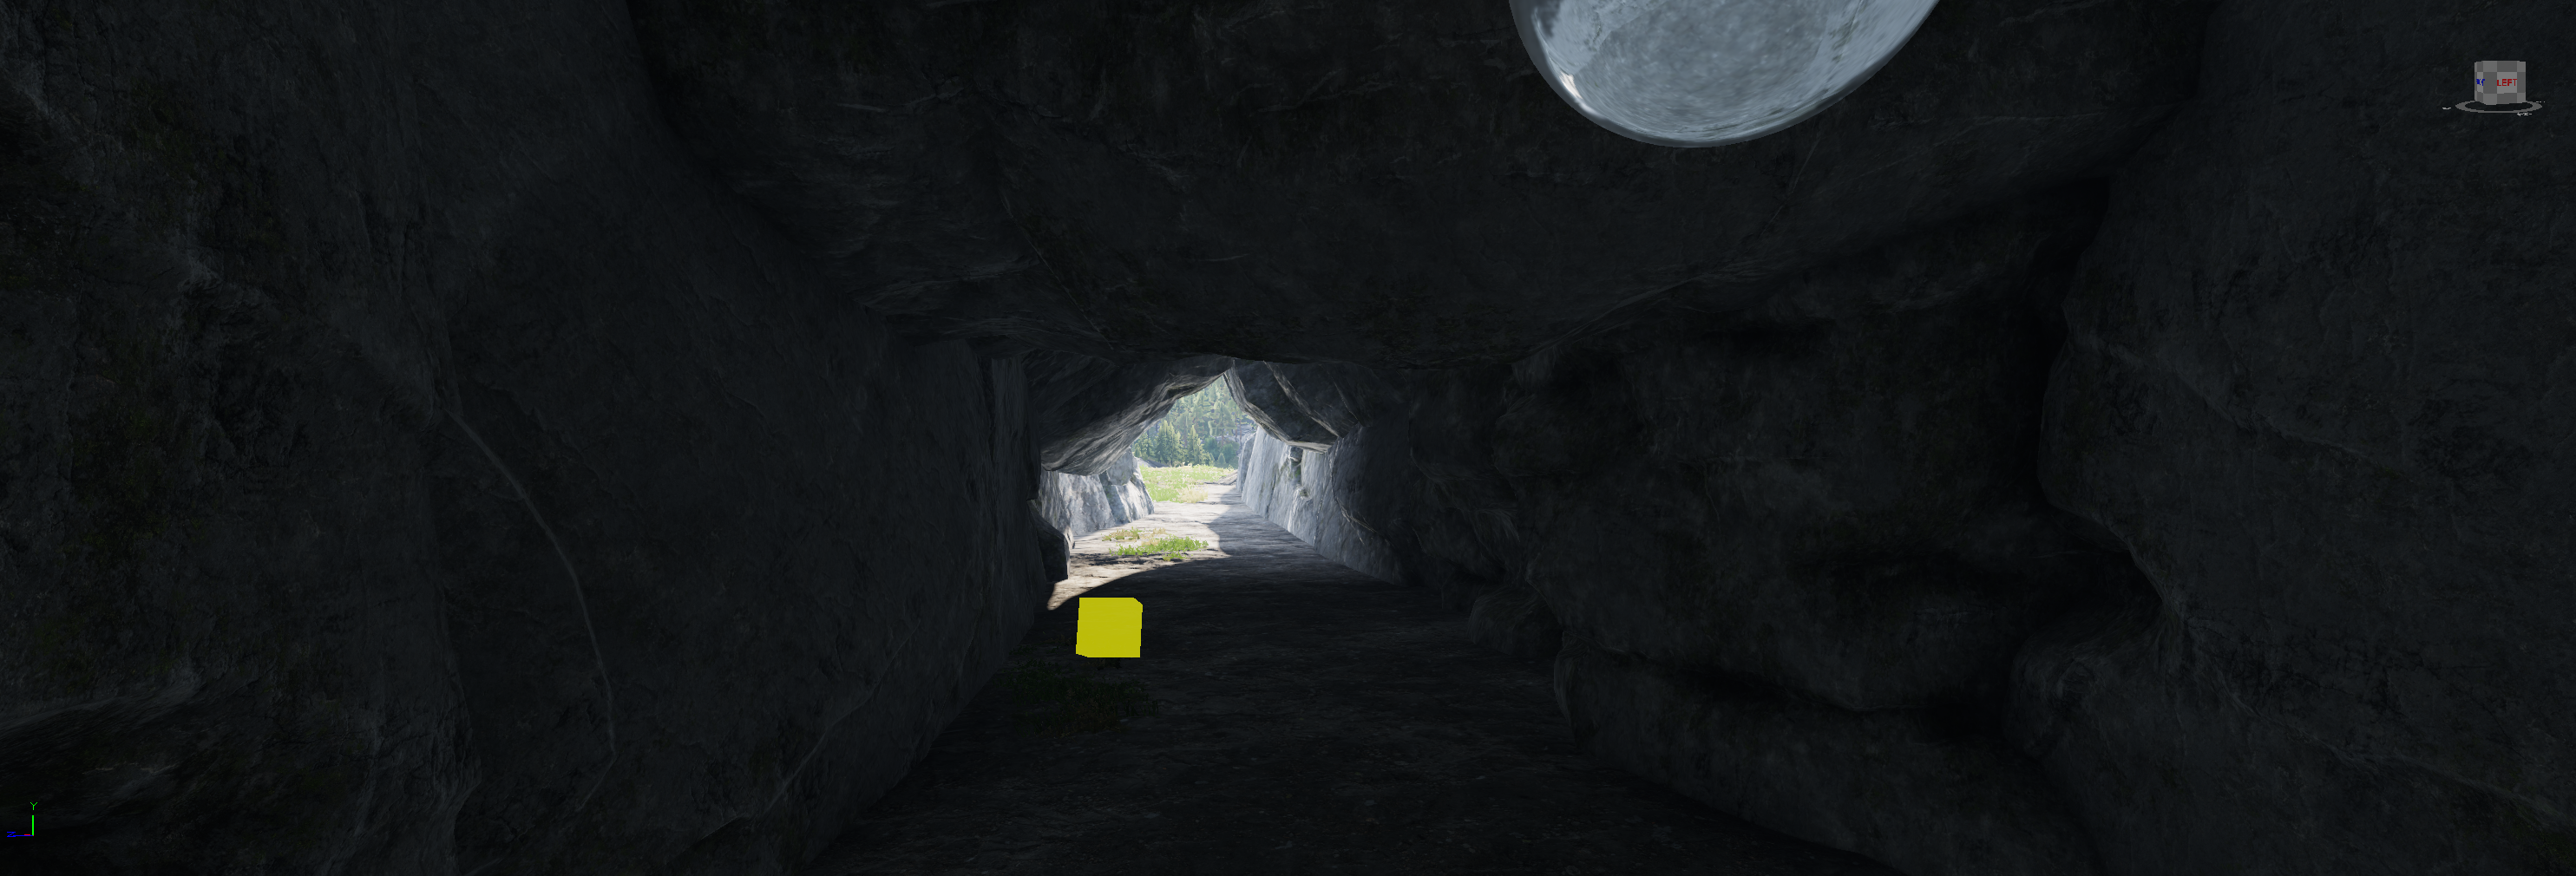
Our basic cave is finished. We can now add some details to make it look like a mine or super-secret lair. Use vegetation objects, rocks, and your imagination to hide the entrance if you need to.
What time is it? You guessed it, backup time! Backup your project now. You also want to export all your masks and back them up too. We'll use those files in the next step!
Satellite Map
Now that all our settlements have been placed, it's time to finalize our sat map. We start by taking all the mask layers we've painted, exporting them one by one as single files, and then adding them in an image editor, layer by layer, in the same order as in the surface painting panel in Workbench (opposite order when working with layers in Photoshop as the bottom layer is the first layer there).
The first layer should be the bottom layer because these are completely filled on every tile. Now we open up the middle_BCR files of our surfaces and fill each of our layers in Photoshop with the respective middle MCO textures. In Photoshop, this is easy. Open the file, select "all," and choose "define pattern from the menu."
Similarly, rock surfaces and wheat fields should be added. When all the surfaces are in, it's all down to how good you are with image editors in how to enhance the images. In the real world, many factors will add to the coloration of your surfaces. Fields will have brighter parts where the ground is drier, and where water accumulates, vegetation is generally greener and healthier. On Everon, such variation was added using other software to simulate hydration using generated flow and accumulation maps. These are added to the satellite map to create subtle but important variations.
There are many subtle artistic things you can do to enhance your sat map. The important thing is to have them very subtle, as you want them to match the mid-distance shading of your surface as much as possible. These are all the advanced photo editor tricks, and we won't cover them in detail in this guide as they're not at all essential to make a great terrain and are entirely done in third-party software.
Backup your project now.
Import your fancy new sat map in World Editor, and as usual, wait until it's done processing everything.

Remember this? Wait for that, too, before doing anything else. When it's done, reload your terrain, and you can enjoy the new distant look!
Final Words
All done!
…but not really. There are still many things left to make the terrain 100% (most of it is up to your object placing and surface painting skills but not all).
Now we have a working terrain. Completely finished, or long-term project to build on… you may need further information:
- See the Terrain Preparation Tutorial to know the basics of terrain setup
- See the Publishing Process to know how to upload and update your mod in the Workshop
- See the Navmesh Tutorial know how to generate a navmesh
The Wiki will answer further questions… Soon™!
Recommended Tools
- Images: Krita, Gimp, Adobe Photoshop, or alternatives
- Terrain: Instant Terra for terrain generation, masks, height maps, etc. You can use it to create all the source files and implement them in your workflow from start to finish. There are alternatives but no free ones I can recommend
- Data: QGIS For manipulating and converting DEM and terrain data; Serval, a QGIS tool that can be used to add bathymetry data and other features to DEM data
- Repository: we use Subversion (SVN) along TortoiseSVN as a version control repository. This helps a lot when several people are working on the same files and can serve as a backup/revert solution.
Remember to Use Search on the Arma Reforger Forums (Terrain Creation sub-forum) for keywords related to your problem before you post a new thread.

You'll find helpful people in the Arma Platform Discord Server - the Enfusion Modifications\**#enfusion_terrain_makers** channel is waiting for you!