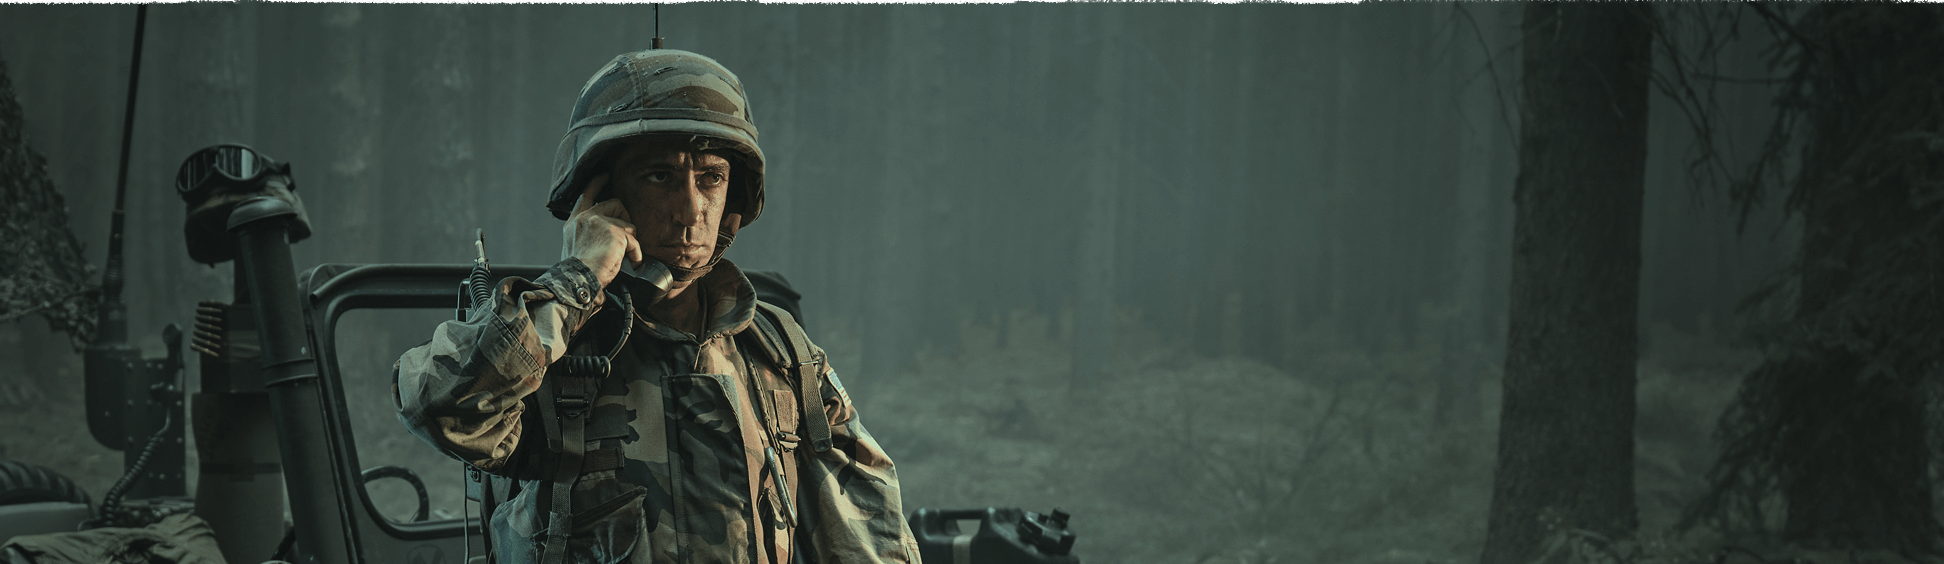


The goal of the this Boot Camp is it to learn the very basics of how to work with and mod audio in Arma Reforger. We will have a look at Enfusion's Audio Editor, replace the character's footstep sounds and look at so-called Signals in the process.
Resources
Over the past year, we have been working tirelessly on updating the audio documentation of our BIKI and are finally ready to share the results. You can explore an extensive Audio Editor documentation via this link or find out more about Reforger-specific audio data setup here. Keep an eye out, as updates are still pouring in! Aside from this Bootcamp video, you might also want to check out or getting started guide in the BIKI.
Preface
Timestamp: 00:41
There are a few basic things and concepts that will help to understand the audio toolset and get into modding quicker.
If you are new to Game Audio, opening the Audio Editor for the first time might be a bit confusing, as it doesn't exactly scream "audio" at the first glance. An important thing to understand is that the Audio Editor is primarily used for audio compositing, not audio creation. Just like 3d models are not created within Enfusion, the audio samples used to create the final ingame soundscape are also created in external software and then imported into Enfusion. We then use the Audio Editor to instruct the engine when and how to play these sounds.
These audio compositions are stored in so-called .acp files. Reforger does not allow for simple .wav file playback.
Audio Editor Basics
Timestamp: 02:54
The Audio Editor is node-based, meaning nodes are stringed together in order to create signal chains. Available nodes can be added via the ribbon at the top of the Audio Editor. Most nodes also have hidden ports; They can be activated by right-clicking the node, selecting the port name and "enabling" them.
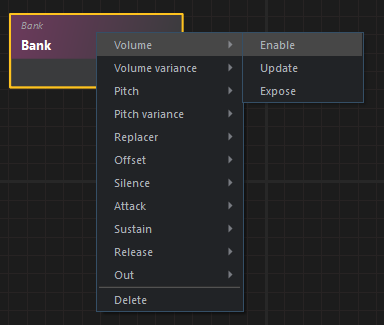
(Right-click context menu for enabling a port)
There are four quintessential nodes, usually connected in this order:
The BankLocal (or just Bank) is the heart of most .acp files, because it stores the actual .wav files.
Note that Enfusion only supports .wav files (Recommended: 16 bit, 48KHz)
.wav files can be added by dragging them from the Resource browser into the bank. Holding shift while doing so will fully replace the bank's current content.
Also note that all .wav files must be registered by Enfusion in order to work properly. To do so, right-click the file(s) in the Resource browser and choose "Import and register" if available.
The Shader node, at the most basic level, determines how the audio stream going into it behaves over distance. It works in conjunction with dedicated nodes with the same names as the Shader's (by default hidden) input ports:
Spatiality determines how spatialized the sound is, meaning how "locatable" in the gameworld. A spatiality of 0 means the sound will play back non-sptalized, or "2D", while a sptiality of 1 means the sound will be fully placed within the gameworld.
Amplitude determines the volume attenuation/falloff over distance.
Frequency determines the loss of higher frequencies over distance, mimicking the real-world phenomenon.
The Sound node technically registers a sound as a sound within Enfusion. When the game instructs an entity to play a sound, it will look for a Sound node matching the given sound event name. If found, everything connected to the Sound node will play back as "the sound".
The Mixer (or OutputState) node routes the sound into one of the game's mixer inputs. Reforger only uses one mixer, called FinalMix.afm.
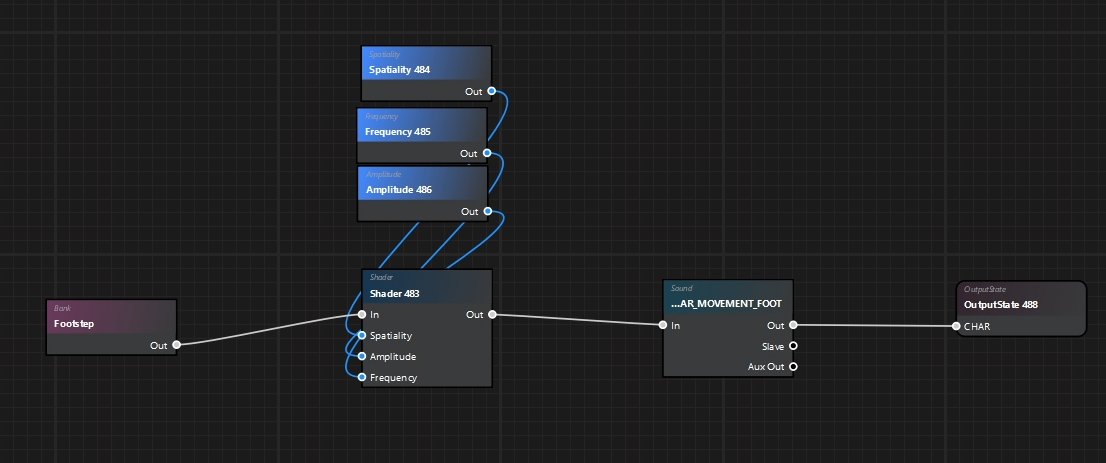
(A typical audio chain: Bank→Shader→Sound→Mixer)
Our best friend is the "Listener setup" window. It displays a grey world with a red dot in the middle by default. The red orb will be used as a playback position. When clicking into the window, we can use the default camera controls in order to move around the red orb and listen to the sounds from various distances and angles, using the spacebar in order to playback sound from the currently active node(s).
Replacing an existing (footstep) sound
Timestamp: 19:25
Like most other files within Enfusion, we can mod an .acp file by right-clicking it in the Resource Browser and selecting "Override in <NameOfYourMod>". This will create an exact copy of the file within your mod. A puzzle piece will indicate that the .acp is modded and will be used instead of the original one instead.
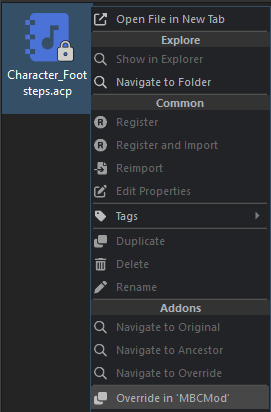
(Overriding an .acp file)
In order to find out what .acps an entity uses, you can open the entity or inspect its attributes within the world editor, search for its corresponding SoundComponent (e.g. CharacterSoundComponent, WeaponSoundComponent...) and check the FileNames array. It contains all .acps used by the entity. In our case, we want to overwrite the Character_Footsteps.acp. We will then, again, create and connect a Bank containing a footstep sound, a shader setup, a Sound node with the name SOUND_CHAR_MOVEMENT_FOOT and a Mixer. In the bank, we can use the "Volume variance" and "Pitch variance" attributes in order to randomize the volume and pitch a bit. This is great for breaking up repetitiveness without the need for a large amount of samples.
Signals and .sig files (Speed-based volume)
Timestamp: 34:22
Signals are a way of interfacing between the Gameworld and Audio (and other areas). At the core, a signal simply is a value defining the attribute of something, e.g. the current RPM of a vehicle or the time of day. One way of seeing which Signals are available on an entity is it to open up the debug menu using CTRL+WIN+ALT, then using the arrow keys to navigate to Sounds→Chimera Sounds→Signals Debug. We can then select entities and their SoundComponents within the environment and get a live display of their Signals.
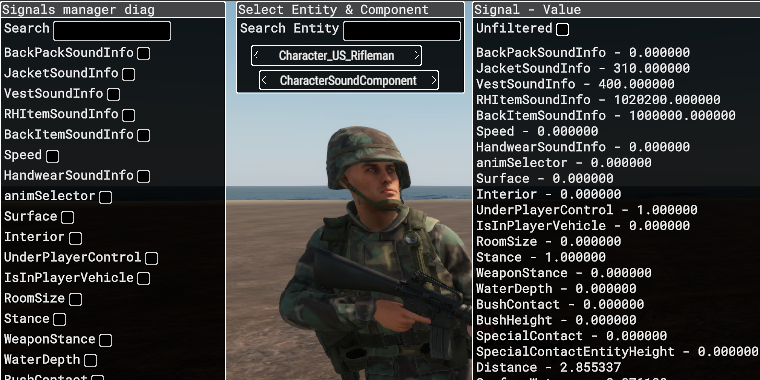
(The Signals Debug view)
We want to have our footsteps' volume depend on the character's speed. Conveniently, there is a "Speed" Signal, outputting the speed in meters per second.
In order to use this Signal within an .acp, we need to create a Signal file (.sig). This can be done via File→New→Signal. The new Signal will be created, with a default "Input" node connected to an "Output" node. Note that the window still looks like the Audio Editor, but we are actually within the Signals Editor now, easily distinguished by the different set of available nodes. At the most basic level, the Signals Editor allows us to do mathematical calculations and output their values for usage within .acps.
Using the Speed Signal is as easy simply renaming the Input node to Speed. Let's also rename the Output node to Footstep_V. Since the Input node is directly connected to the Output node, our speed would currently output the "raw" speed in meters per second, which we don't want. Our goal is it to get something akin to a volume percentage. We can do so by putting an Interpolate node between our Input and Output.
The Interpolate node will smoothly interpolate beetwen Ymin and Ymax based on an input value ranging from Xmin to Xmax. Let's configure it as follows and then take a look at the result:
X min = 0.50
X max = 5.50
Ymin = 0.40
Ymax = 1.00
This would translate to the following: Between 0.50m/s and 5.50m/s, the output value will smoothly increase from 0.40 to 1.00.

We can save our .sig file and then simply drag&drop it into our .acp. Let's enable the Volume port on the Sound node and connect our Footstep_V signal output with it.
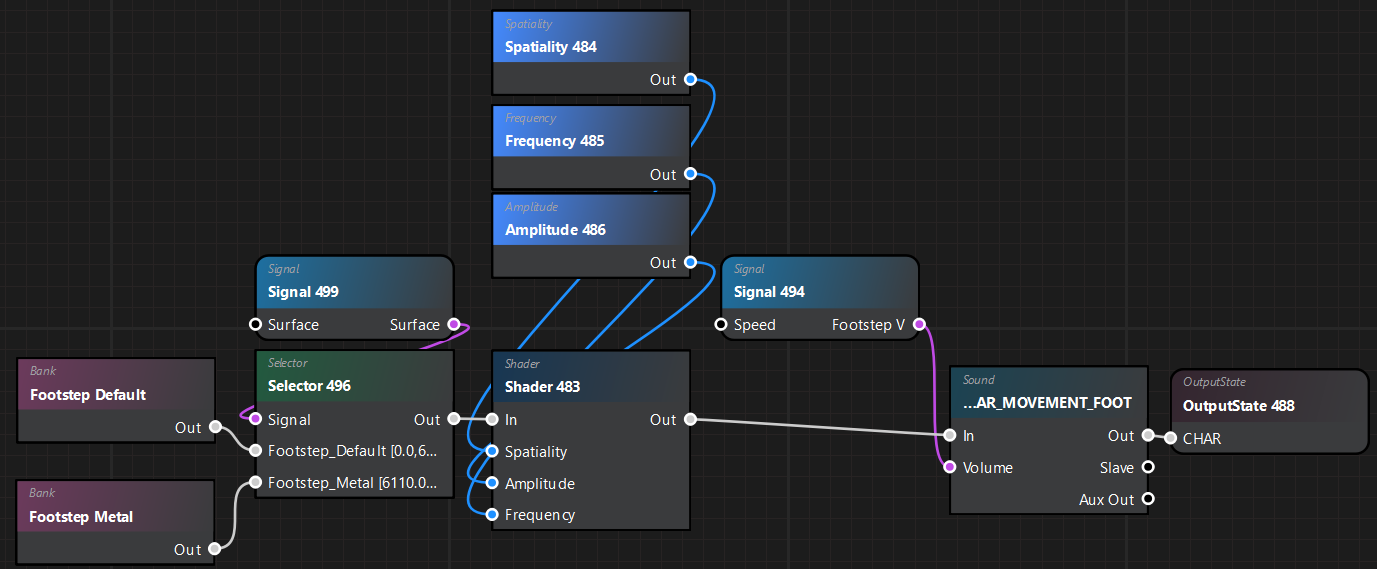
Using Selectors (Different footsteps for different materials)
Timestamp: 42:55
Finally, we want to use different footstep sounds for different surfaces. Selectors are a great tool for that, so let's create one. Selectors allow it to switch playback streams based on Signal values. In case of our Footsteps, we want to use the "Surface" Signal. Each surface type in Reforger returns a number. We can use an existing .sig file simply called "Surface.sig" for this purpose. Let's drag & drop it into our .acp, then connect it to the Signal input of our Selector. We then select the Selector and add two Ports via its item attributes, naming them "Footstep_Default" and "Footstep_Metal". Expanding the two ports, we set their values like this:
Footstep_Default:
Min: 0.00
Max: 6110.00 (Because that's the surface number for Metal)
Check "Default"
FootStep_Metal:
Min: 6110.00
Max: 6120.00
This translates to the following: If the input Signal is between 0 and 6110 (NOT including 6110), the Footstep_Default input will be used. If the input Signal is between 6110 and 6120 (NOT including 6120), the Footstep_Metal input fill be used. If the input Signal does not fall within any of these boundaries, Footstep_Default will be used because we checked the "Default" attribute.
We can now copy our footstep bank and replace its samples with metal footsteps (e.g. by using the samples that come with vanilla Reforger) and connect the banks accordingly. We should then hear the default footsteps, except for when walking on a metal object, in which case the metal footsteps should be audible.
Calling sounds via script
Timestamp: 51:23
In case you are already familiar with scripting, you might be wondering how to play a sound via script. It's pretty straightforward: All we need to do is it to get the entity's SoundComponent and then use its "SoundEvent" method:
SoundComponent soundComp = SoundComponent.Cast(GetOwner().FindComponent(SoundComponent));

if (!soundComp)
    return;

soundComp.SoundEvent("YOUR_SOUND_NAME");