Creating a Layout and Common Widget types
User Interfaces (UIs) in Reforger are achieved by Widgets, objects dedicated to:
Displaying data
Handling player interactions
Organizing other Widgets on the screen
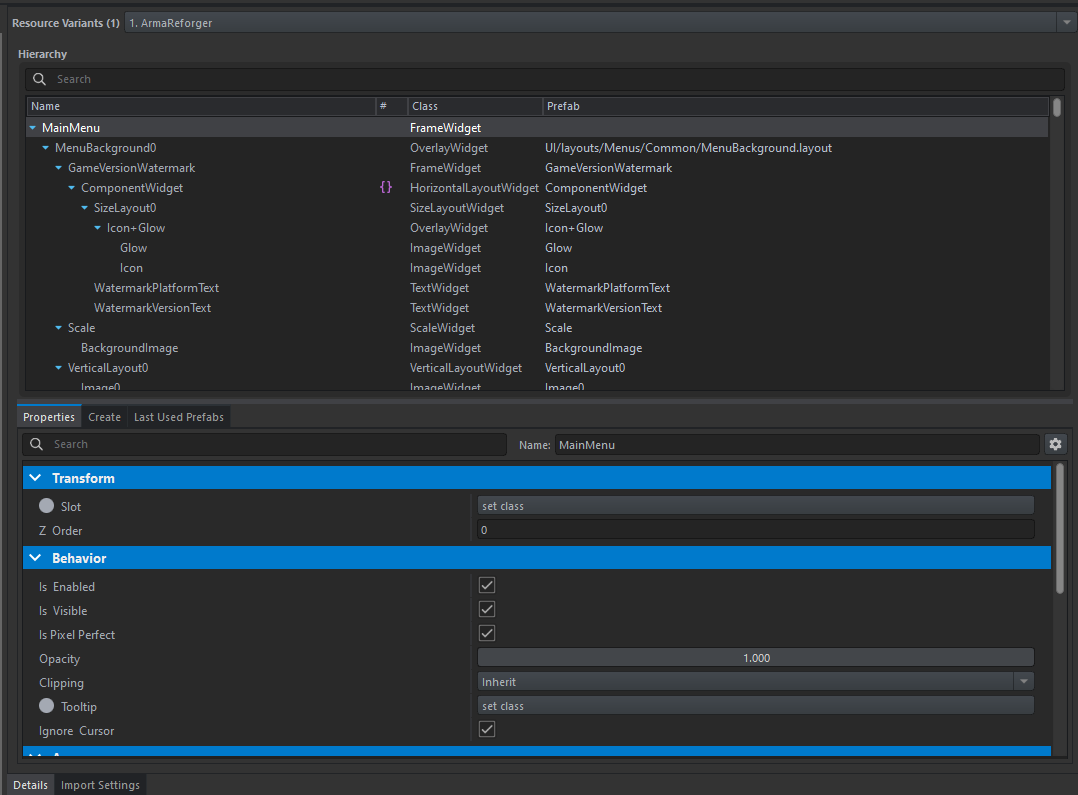
Widgets are nested in hierarchies to define how they are slotted in the available screen space, how they scale and how they communicate with each others. These hierarchies are constructed in .layout files, through a specialized editor.

Different Widget types are used for different needs. For example, an Edit Box Widget is made to accept and store a text prompt (like a login or password form), an Overlay Widget is used to stack other Widgets on top of each other, and an Image Widget is used to display a texture.
Some Widgets can accept children. Once inserted in a parent Widget, these are assigned a "Slot" class.
A slot is a collection of properties in a child widget that contains information about the positioning of the child in the parent. Even though the slot is in child widget, its type is determined by the parent and cannot be changed unless we move the widget to a different parent. Not all widgets have unique slots, e.g., Frame and Panel widgets share a slot type as well as Horizontal and Vertical layout widgets. In such a case, a slot will be reused even if the widget is moved to a parent of a different type. However, some information from the slot may be interpreted differently in the other parent.
The parent often controls the size of child Widgets and we cannot set it directly (unless a parent explicitly allows it such as a Frame widget). There are often two modes of size setting.
The first mode is when the parent dictates the size of the child unconditionally. In this case, there is no negotiation. An example of this mode is Fill mode in Layout Slot.
The second mode is that the parent asks the child for its desired size. In this mode, the parent agrees to set the size returned by the child even if the child would overflow out of the parent. This is the case for the Grid widget Auto mode.
Then we can have a combination of these two when the parent asks for a desired size but also gives the child some limits it must adhere to. If the limits are adhered to, the parent agrees to set the size desired by the children. This is the case of the Horizontal layout widget.
Layouts can be inserted into other layouts, allowing to create reusable prefabs: this will technically duplicate the Widgets, but they will take their default values from whatever was set in the original layout.
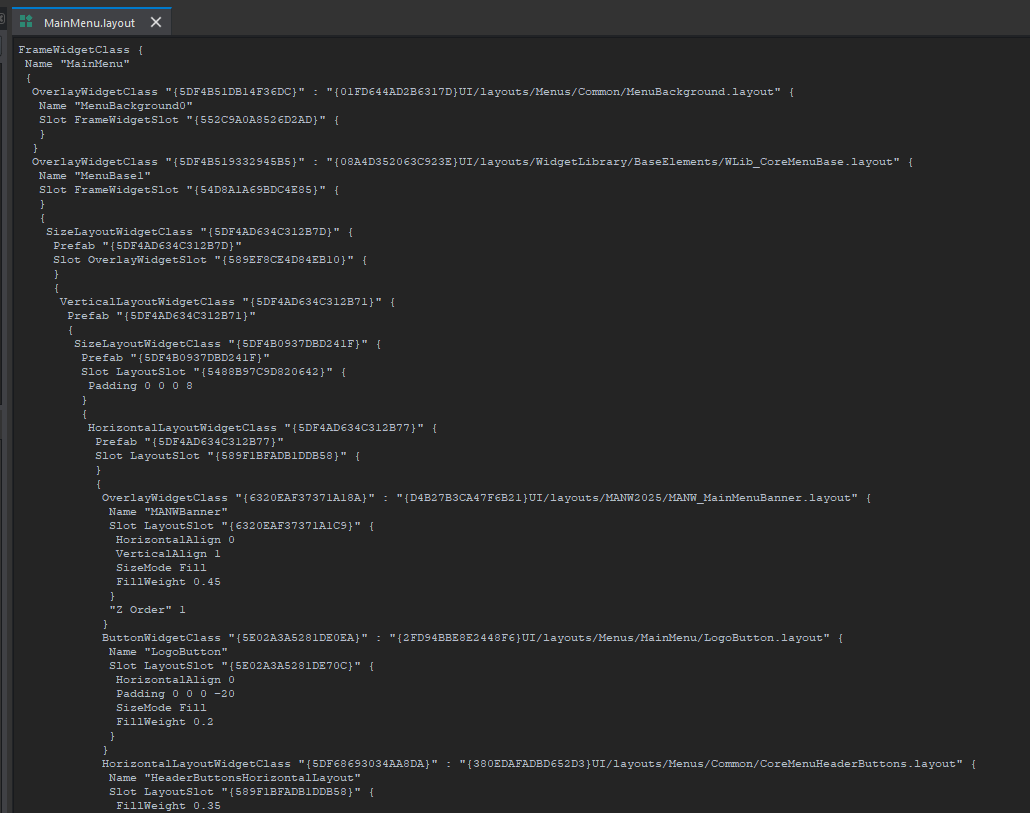
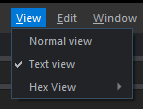
Layouts can be also viewed and worked with in text form:

by selecting the Text View in Workbench's top bar, or by opening the layout file in a text editor.

This can make it easier to find certain properties, as only overrides of default or inherited values will be included in the text view.
Menu Framework
Menus are one way to display the Widgets.
A Menu requires:
An entry in the menu config file associated with the project (like for example ChimeraMenu)
An entry of the same name in the ChimeraMenuPreset enum
A class to control the menu inheriting from MenuBase
A layout defining which Widgets belong to it
The menu can the be opened through the MenuManager class, which also provides other useful methods.
Menus are stacked on top of each other in a last-in-first-out order: the "top menu" is considered "focused," which means it is handling interactions.
MenuBase provides various events that allow you to execute code at certain points of a menu's lifetime, like for example if another menu is opened on top of you current one, it will receive the OnMenuFocusLost event.
Like with Widget components, you can override MenuBase events to execute your code when they are called by the menu framework.
Finding Widgets in Scripts
Any object can have access to a Widget, as long as it know its name and a Widget above it in hierarchy (at any level above, even the Workspace which is the very top of all Widget hierarchies). This is commonly done through the Widget.FindAnyWidget() method.
The Enfusion Widgets API is made to be extremely modular: it is very powerful, and very, very open: any class can modify properties on any Widget at any level of a hierarchy, as any script can easily grab a reference of those Widgets.
As such, it is very important to have clean architecture: try to keep your scripts as "closed" as possible, and provide one component on the root of the prefab that is the ultimate source of truth for its hierarchy, and offers an API for outside classes.
This component should be the manager of the prefab hierarchy and know everything there is to know about it. Try to never modify a Widget down a prefab hierarchy from outside that prefab's components!
SCR_WidgetTools provides many useful methods to find specific Widgets and components, and in general to work with UI hierarchies.
Script Components
Regarding components, these are scripts that can be associated to Widgets. They must inherit from ScriptedWidgetComponent, which itself comes from an event handler class that allows your components to access information about what is going on in the hierarchy, such as player interactions.
When a Widget is created in game, all its components will be initialized in the order they were added to the Widget in the layout editor, and their HandlerAttached() method will be called.
Like with menu classes, you can override these events to execute you code when the framework calls them.
Components allow you to separate concerns, create reusable "lego blocks," provide attributes to dynamically change Widget properties, and in general are a great way to customize and control the look and behavior of your UI.
What you will often find in Reforger is that some components are meant to be generic and reusable, and provide generic functionality like playing sounds or animating, while others specialize in controlling the very specific hierarchy they are attached to, often because that hierarchy is meant to represent very specific information coming from this or that game system.
Workspace Widget
Ultimately, all Widgets are attached to the Workspace Widget. This special "root" Widget is the very top of all UI: menus, dialogs, and tooltips. All these complex hierarchies ultimately live as children of Workspace.
While technically there could be multiple Workspaces instantiated at a time, Reforger always ensures there is only one, accessible from GetGame().GetWorkspace().
The Workspace Widget itself provides many useful functionality:
CreateWidgets() allows you to dynamically spawn new widgets from a layout file, useful for instance if you have to fill a list, like servers or scenarios
DPIScale() and DPIUnscale() allow you to convert screen position and size values from reference to scaled resolution and vice versa
For example: Widget.GetScreenPos() will return scaled values, but if you want to set the position of a Widget explicitly (maybe during a translation animation) you want to use FrameSlot.SetPos() and give it unscaled coordinates!
AddModal() allows you to mark a hierarchy of Widgets as "modal". This will make those Widgets the only ones capable of receiving player inputs and recognizing mouse movement, for the purpose of generating Widget events.
Events Propagation
This is a key characteristic of Widget events: ScriptedWidgetEventHandler, the base class of Widget components, can receive various events generated by Widgets. This allows you to respond to such events with your code. Different Widget types can generate different events: for instance, only Edit Boxes will generate OnWriteModeEnter().
Many such events return a bool: this controls their propagation. When a Widget generates an event, it will propagate up the hierarchy, so that any component on the original Widget and its parents will receive the event and can react to it. However, if a component overrides the event method and returns true, propagation will be stopped at that component!
All events provide a parameter Widget that tells you the Widget that generated the event. You can use this knowledge plus event propagation control to decide how your components should react to different events coming from different children, allowing for the many complexities of player UX.
Focus
Focus is the flag that determines if a Widget is "selected" via keyboard or gamepad, and thus if pressing the assigned confirmation button will generate the OnClick event from it. This confirmation input is defined through the InputManager framwork: in the chimeraInputCommon.conf file you will find the MenuSelect action, that acts as the global UI confirmation button.
Other actions, MenuLeft, MenuRight, MenuUp and MenuDown define the inputs to control focus navigation. When one of these actions is triggered, focus will move from the currently selected Widget based on its Navigation Rules. These can be modified in each Widget's properties, in the layout editor.
Escape: when escape is set on a widget we look for the closest widget in a given direction. If the closest widget is a parent of the currently focused widget, we recursively resolve the navigation using the parent's rule but the original widget's rectangle.
Wrap: when wrap is set on a widget the navigation cannot escape the widget but it rather wraps around the widget and selects a child on the other side. For a widget without children, this rule behaves the same as stop. For a widget with children, this rule is useful, for example, when the children have escape set. If the child's escape encounters another child, nothing special happens, but if it encounters the parent which has wrap set, the navigation wraps around the parent and a child on the other side is selected.
Stop: if a widget has the stop rule set, the currently selected widget will stay the same, i.e., the navigation in a given direction is not possible.
Explicit: this rule allows specifying a name of a widget to directly jump to. The target of the explicit rule may also be a non-focusable widget such as frame. If set up this way, the Escape algorithm is used on children of the target. If Escape algorithm fails, the first focusable widget among its children is then focused. This may be useful for example in cases when the normal escape navigation would miss all widgets in a container but we would still like to navigate to the container.
HUD Slotting
The HUD Slots are our way to dynamically adjust HUD elements based on available space during gameplay. We have an example layout in the for of HUDManager_Root. Each Info Display added to the HUD Manager Component allows to specify which slot the display should go to, in each menu. It is a simple matter of matching the name of the slot, and duplicating the desired slot Widgets from Root to a menu's hierarchy.
When a menu (like Pause or Inventory) is opened while controlling a character, the system will automatically take HUD elements and re-parent them to the menu hierarchy if it contains a suitable Slot, or hide them otherwise. This allows you, for instance, to still show notification while in Map, or such similar things.
Debug Tools, Tooltips, and Configurable Dialogs
Configurable Dialogs and Scripted Widget Tooltips are some of our solutions for easily creating common, repeatable UI. They rely on configuration files to define how these dialogs and tooltips should look, with the goal of minimizing the amount of scripting needed for such common elements while keeping visual consistency.
More on them can be found here:
https://community.bistudio.com/wiki/Arma_Reforger:Widget_Tooltip_Setup
https://community.bistudio.com/wiki/Arma_Reforger:Dialog_Configuration_Tutorial
There is also a similar solution for generic buttons, the Modular Button: https://community.bistudio.com/wiki/Arma_Reforger:Modular_Button_Component_Tutorial


